Publish your booking site (and your domain)
Create a site, dress it up in Studio, publish it — then connect your own domain name, with the two DNS records it takes.
A YStay booking site is your own shop window: your pages, your theme, a booking
engine that takes payment directly. An address comes with it —
your-slug.ystay.app — and the site works from the moment you publish, even without
a domain name of your own.
A page is made of blocks: hero banner, photo gallery, description, amenities, rates, booking widget, reviews, map, FAQ, contact. The booking block is not a picture of a calendar: it reads the same availability as the listing's own booking page. A night sold elsewhere disappears from the site on the next page load.
The path, screen by screen
Open My sites
The side menu says My site; the page it opens is titled My sites and reads “Create and manage your direct booking sites.” While you have none, it shows “No site yet” and a Create a site button. Every site you create then appears as a card: its
.ystay.appaddress, a Live or Draft badge, then Open editor and a Settings icon.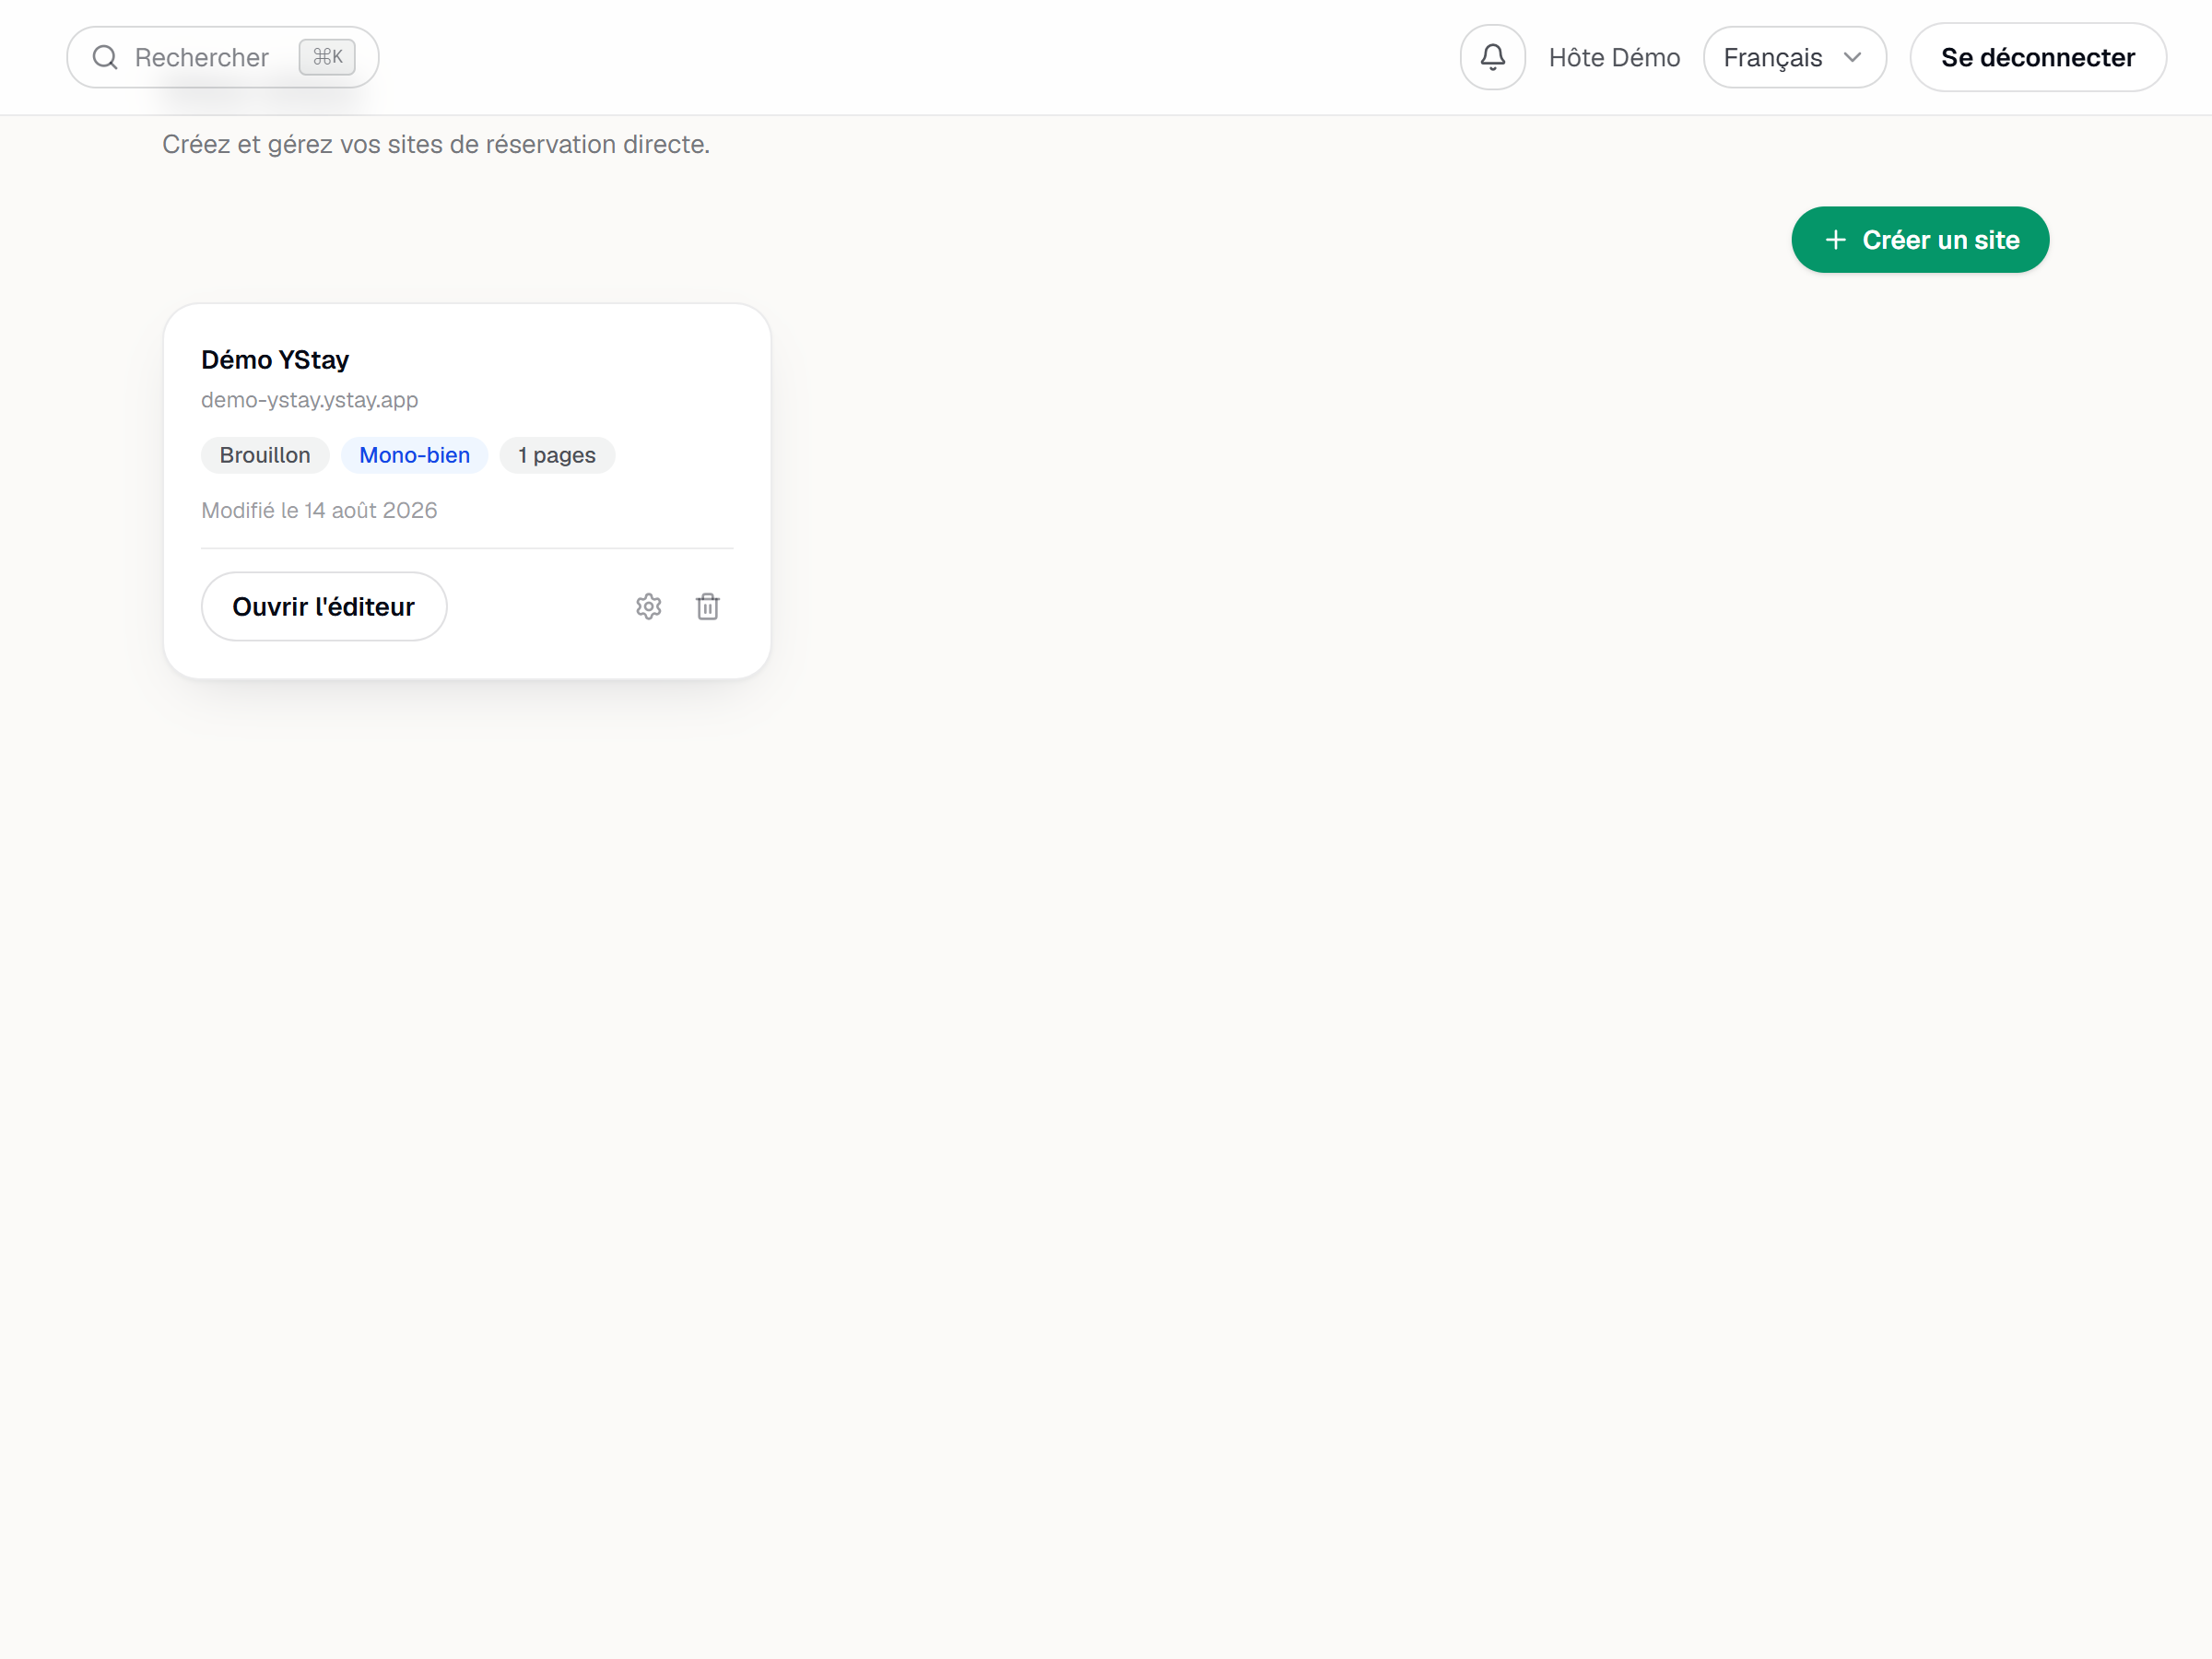
The My sites page with the Create a site button. Create the site
The New site dialog asks for three things: the Site name, the Site type — Single property (“A site dedicated to one listing.”) or Multiple properties (“A showcase site listing several listings.”) — and, in the first case only, the Listing it covers. Create the site drops you straight into the editor.
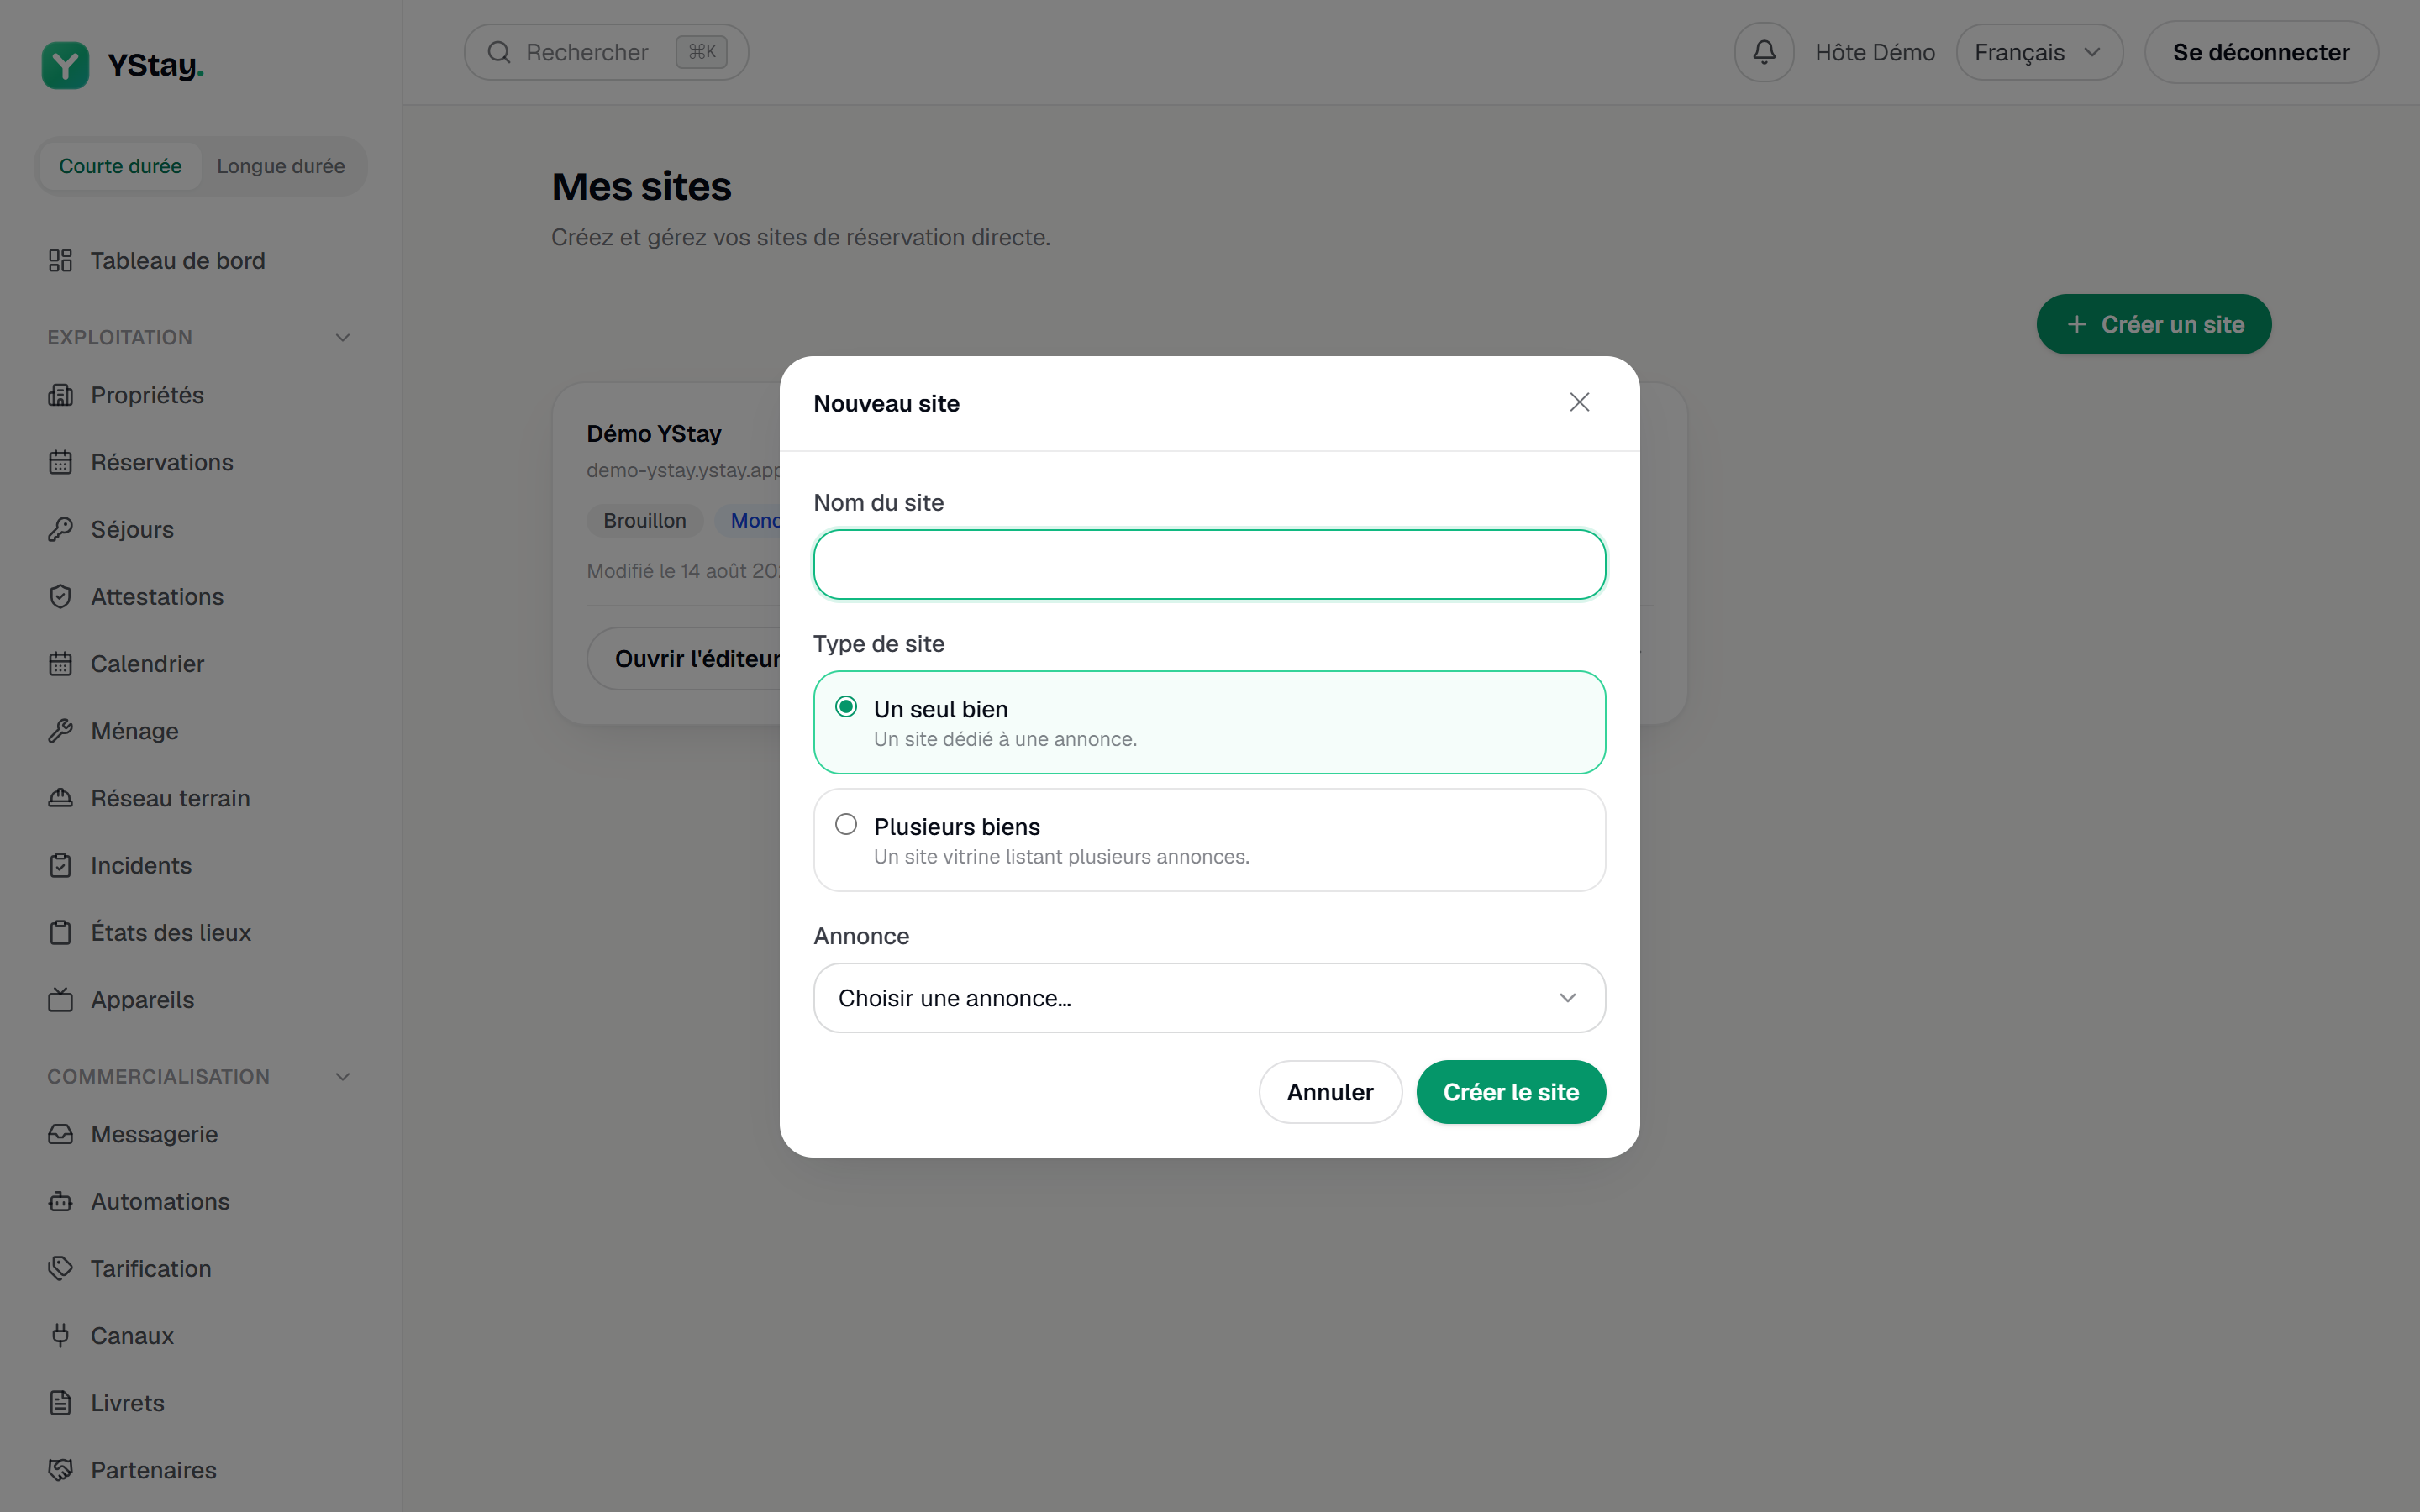
The site creation dialog. Choose a template
A brand-new site has no template yet, so the Choose a template gallery opens on its own, offering six ready-made art directions. Choose applies one and moves your content into it. You can come back through the Templates button in the top bar — applying a template to a site that already has content replaces that content, and the screen asks for a second click to confirm.
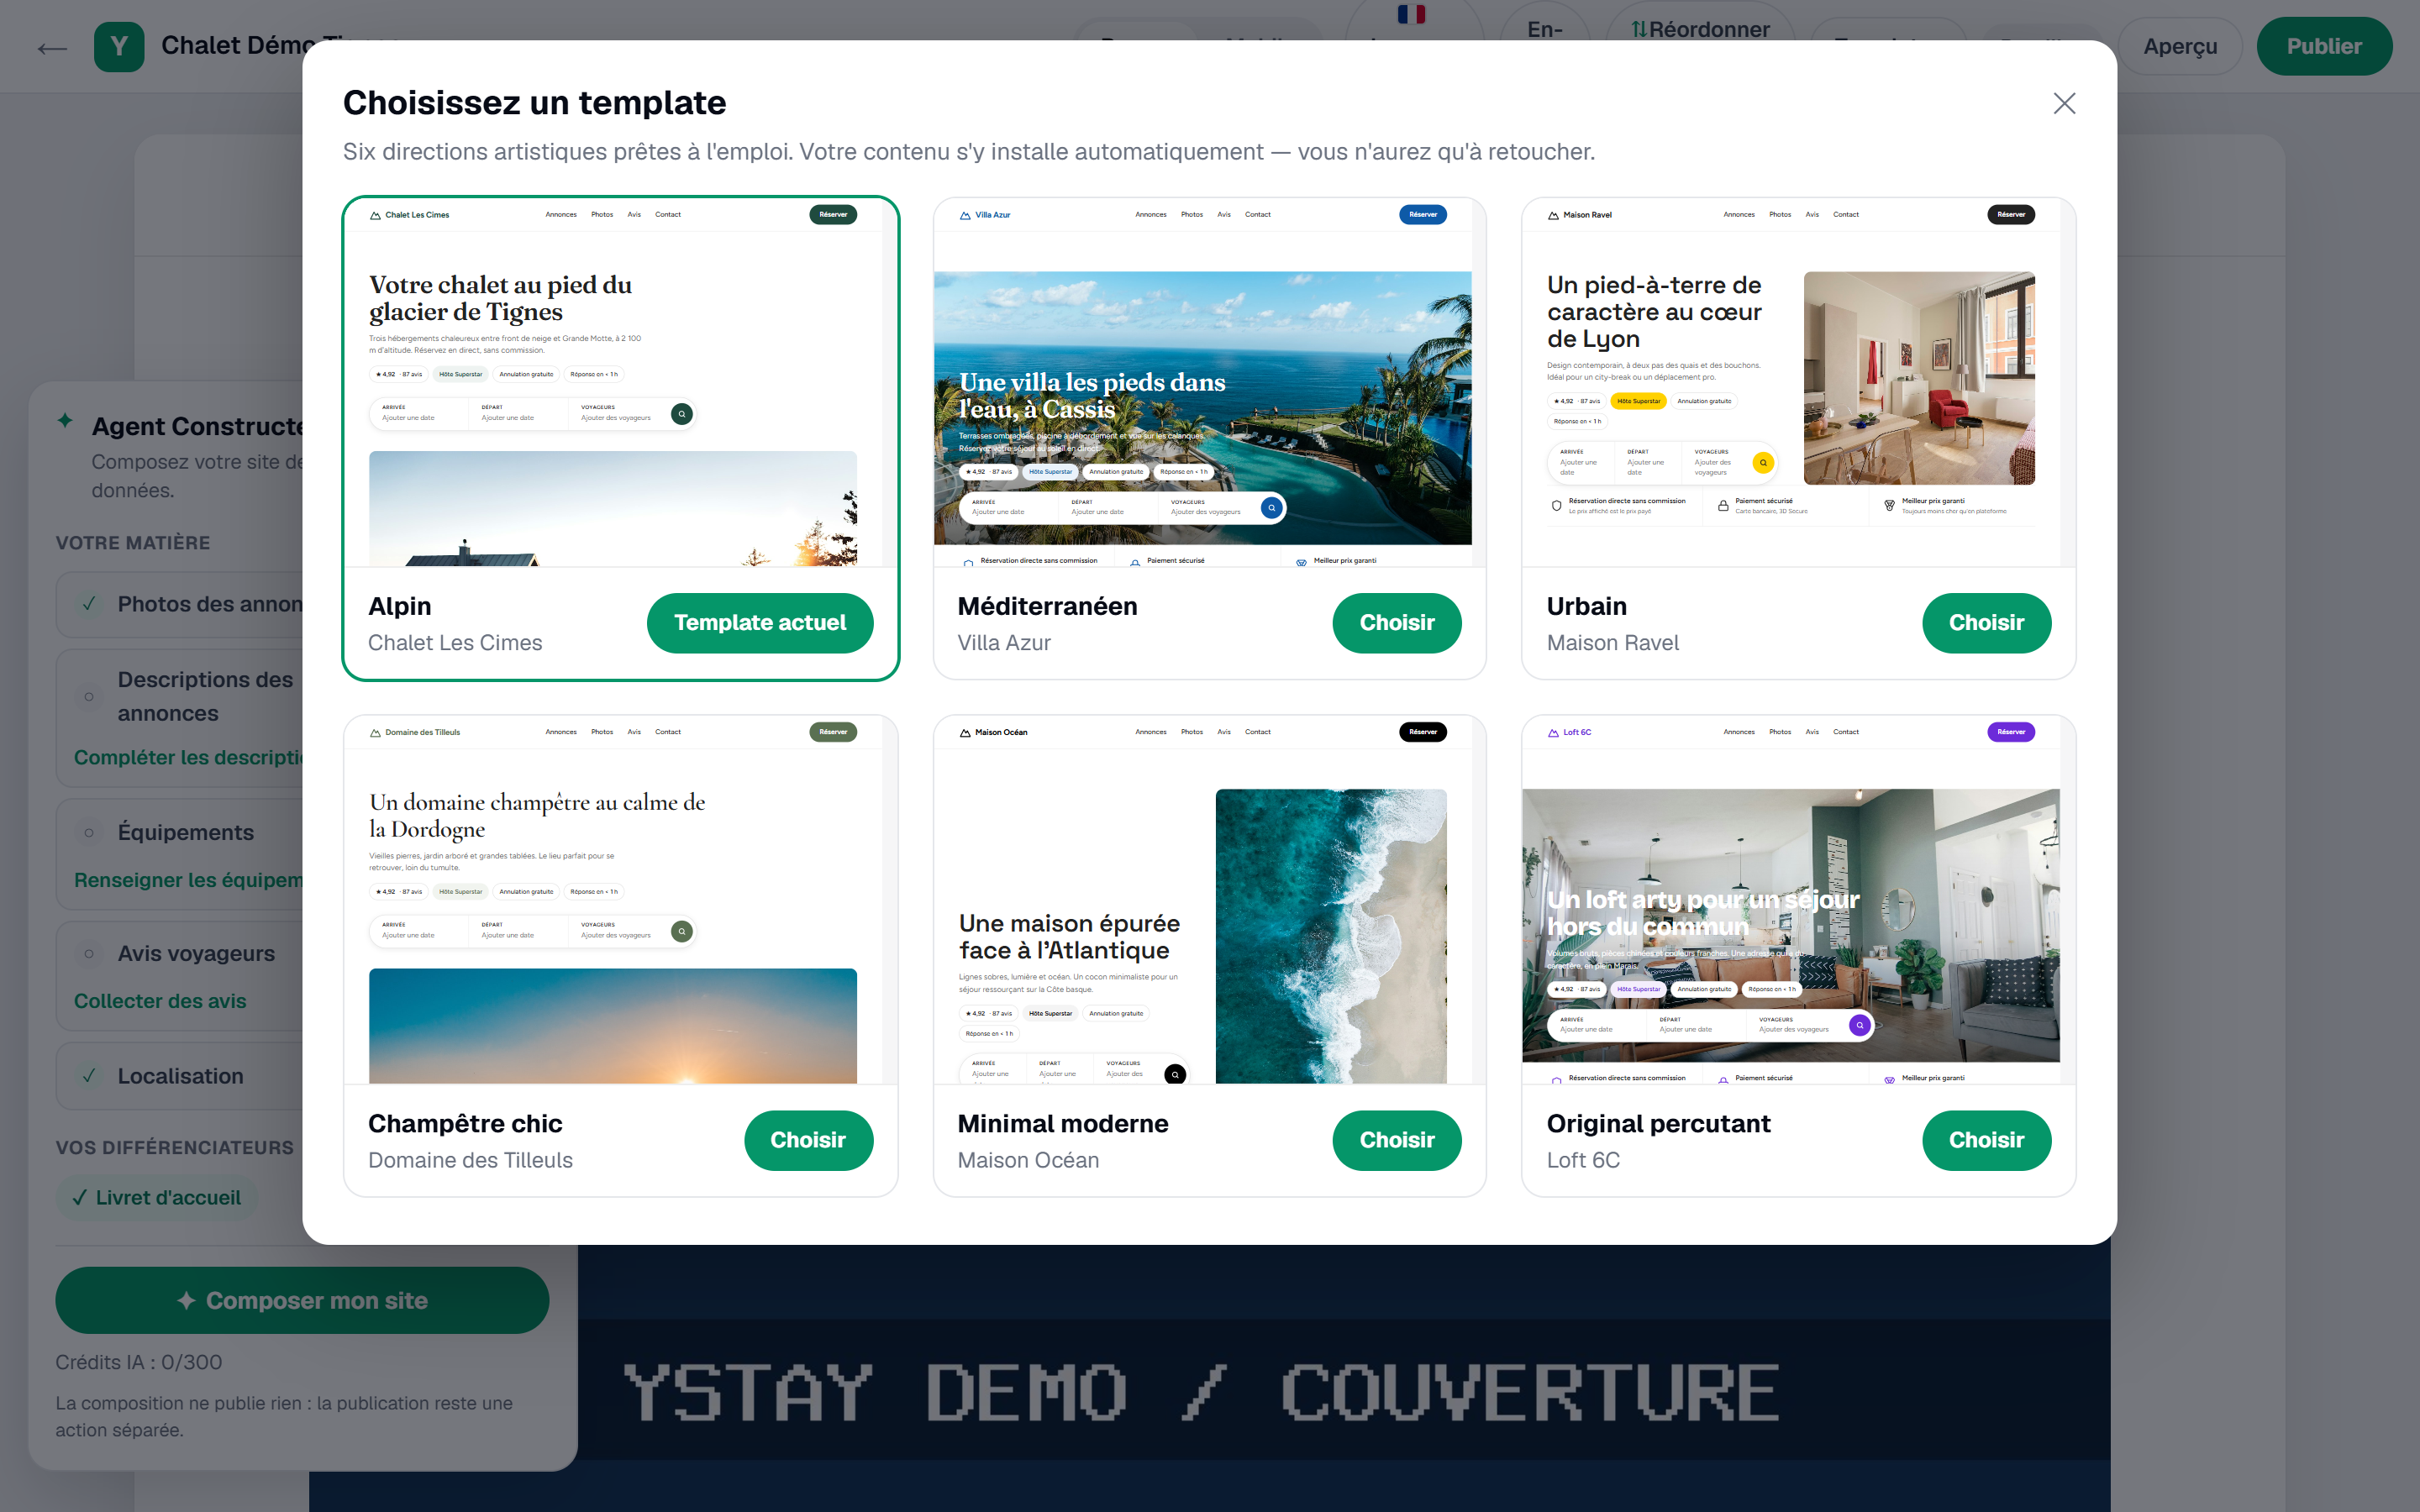
The template gallery of the site Studio. Edit in Studio
Editing happens directly on the rendered page: you click into a heading, into a paragraph, and you type. There is no save button — the Saving… then Saved indicator tracks what reaches the server. But saved does not mean published: your changes stay in the draft.
The top bar gathers several controls — notably the Desktop / Mobile switch, the Preview mode, the Templates button, a status badge (Draft while nothing is live, Live followed by the version number afterwards, Unpublished changes when your draft has moved ahead) and, on the far right, Publish. It carries others depending on the site: scan it rather than rely on this list alone.
A Constructor Agent panel is docked to the left of the rendering: it offers to build your site from your real data and shows your AI credits counter. One click on Collapse folds it away, and the rendering becomes fully visible again.
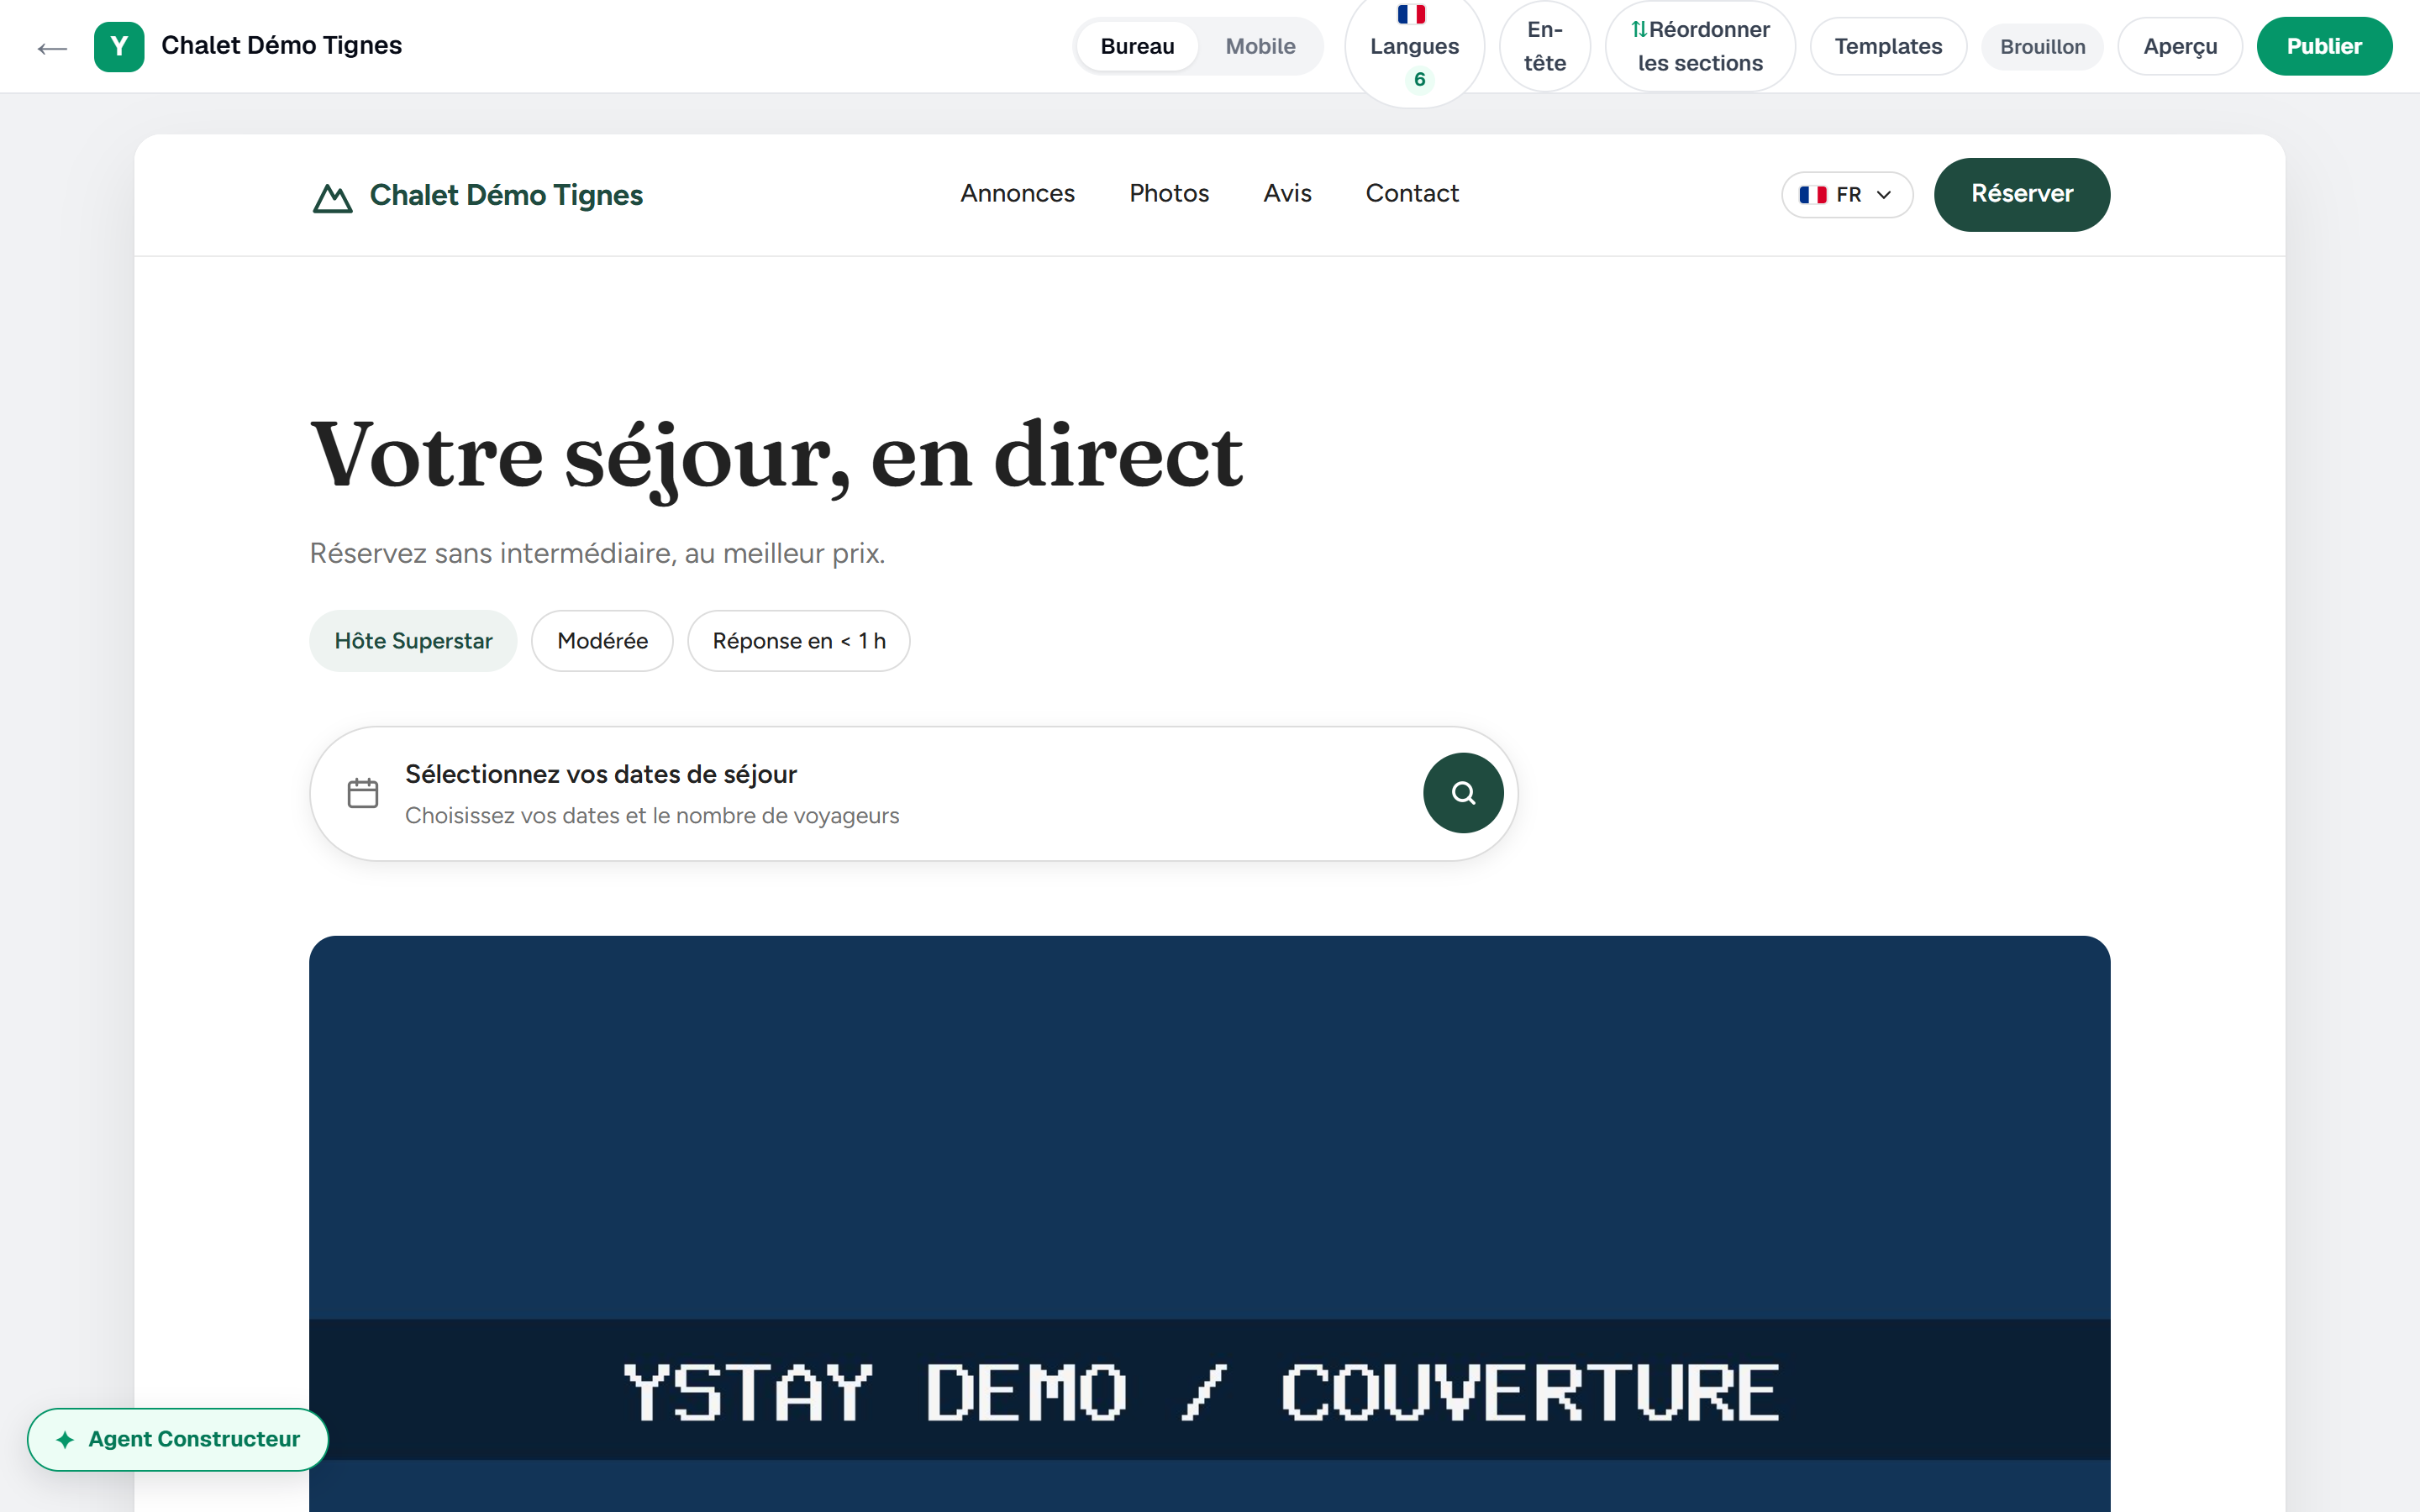
Studio: the status and publishing bar above the editable rendering. Set the name, the address and the languages
Three tabs — Content, Theme and Settings — link the editor, the theme and the Site settings page. Under Site identity: the Site name, the Tagline, the Address (slug) — just below the field, the full address is spelled out, ending in
.ystay.app— then the contact details.A slug already in use is refused on the spot: “This slug is already taken or reserved.” Further down, Site languages ticks “Languages offered to visitors of the public site.”
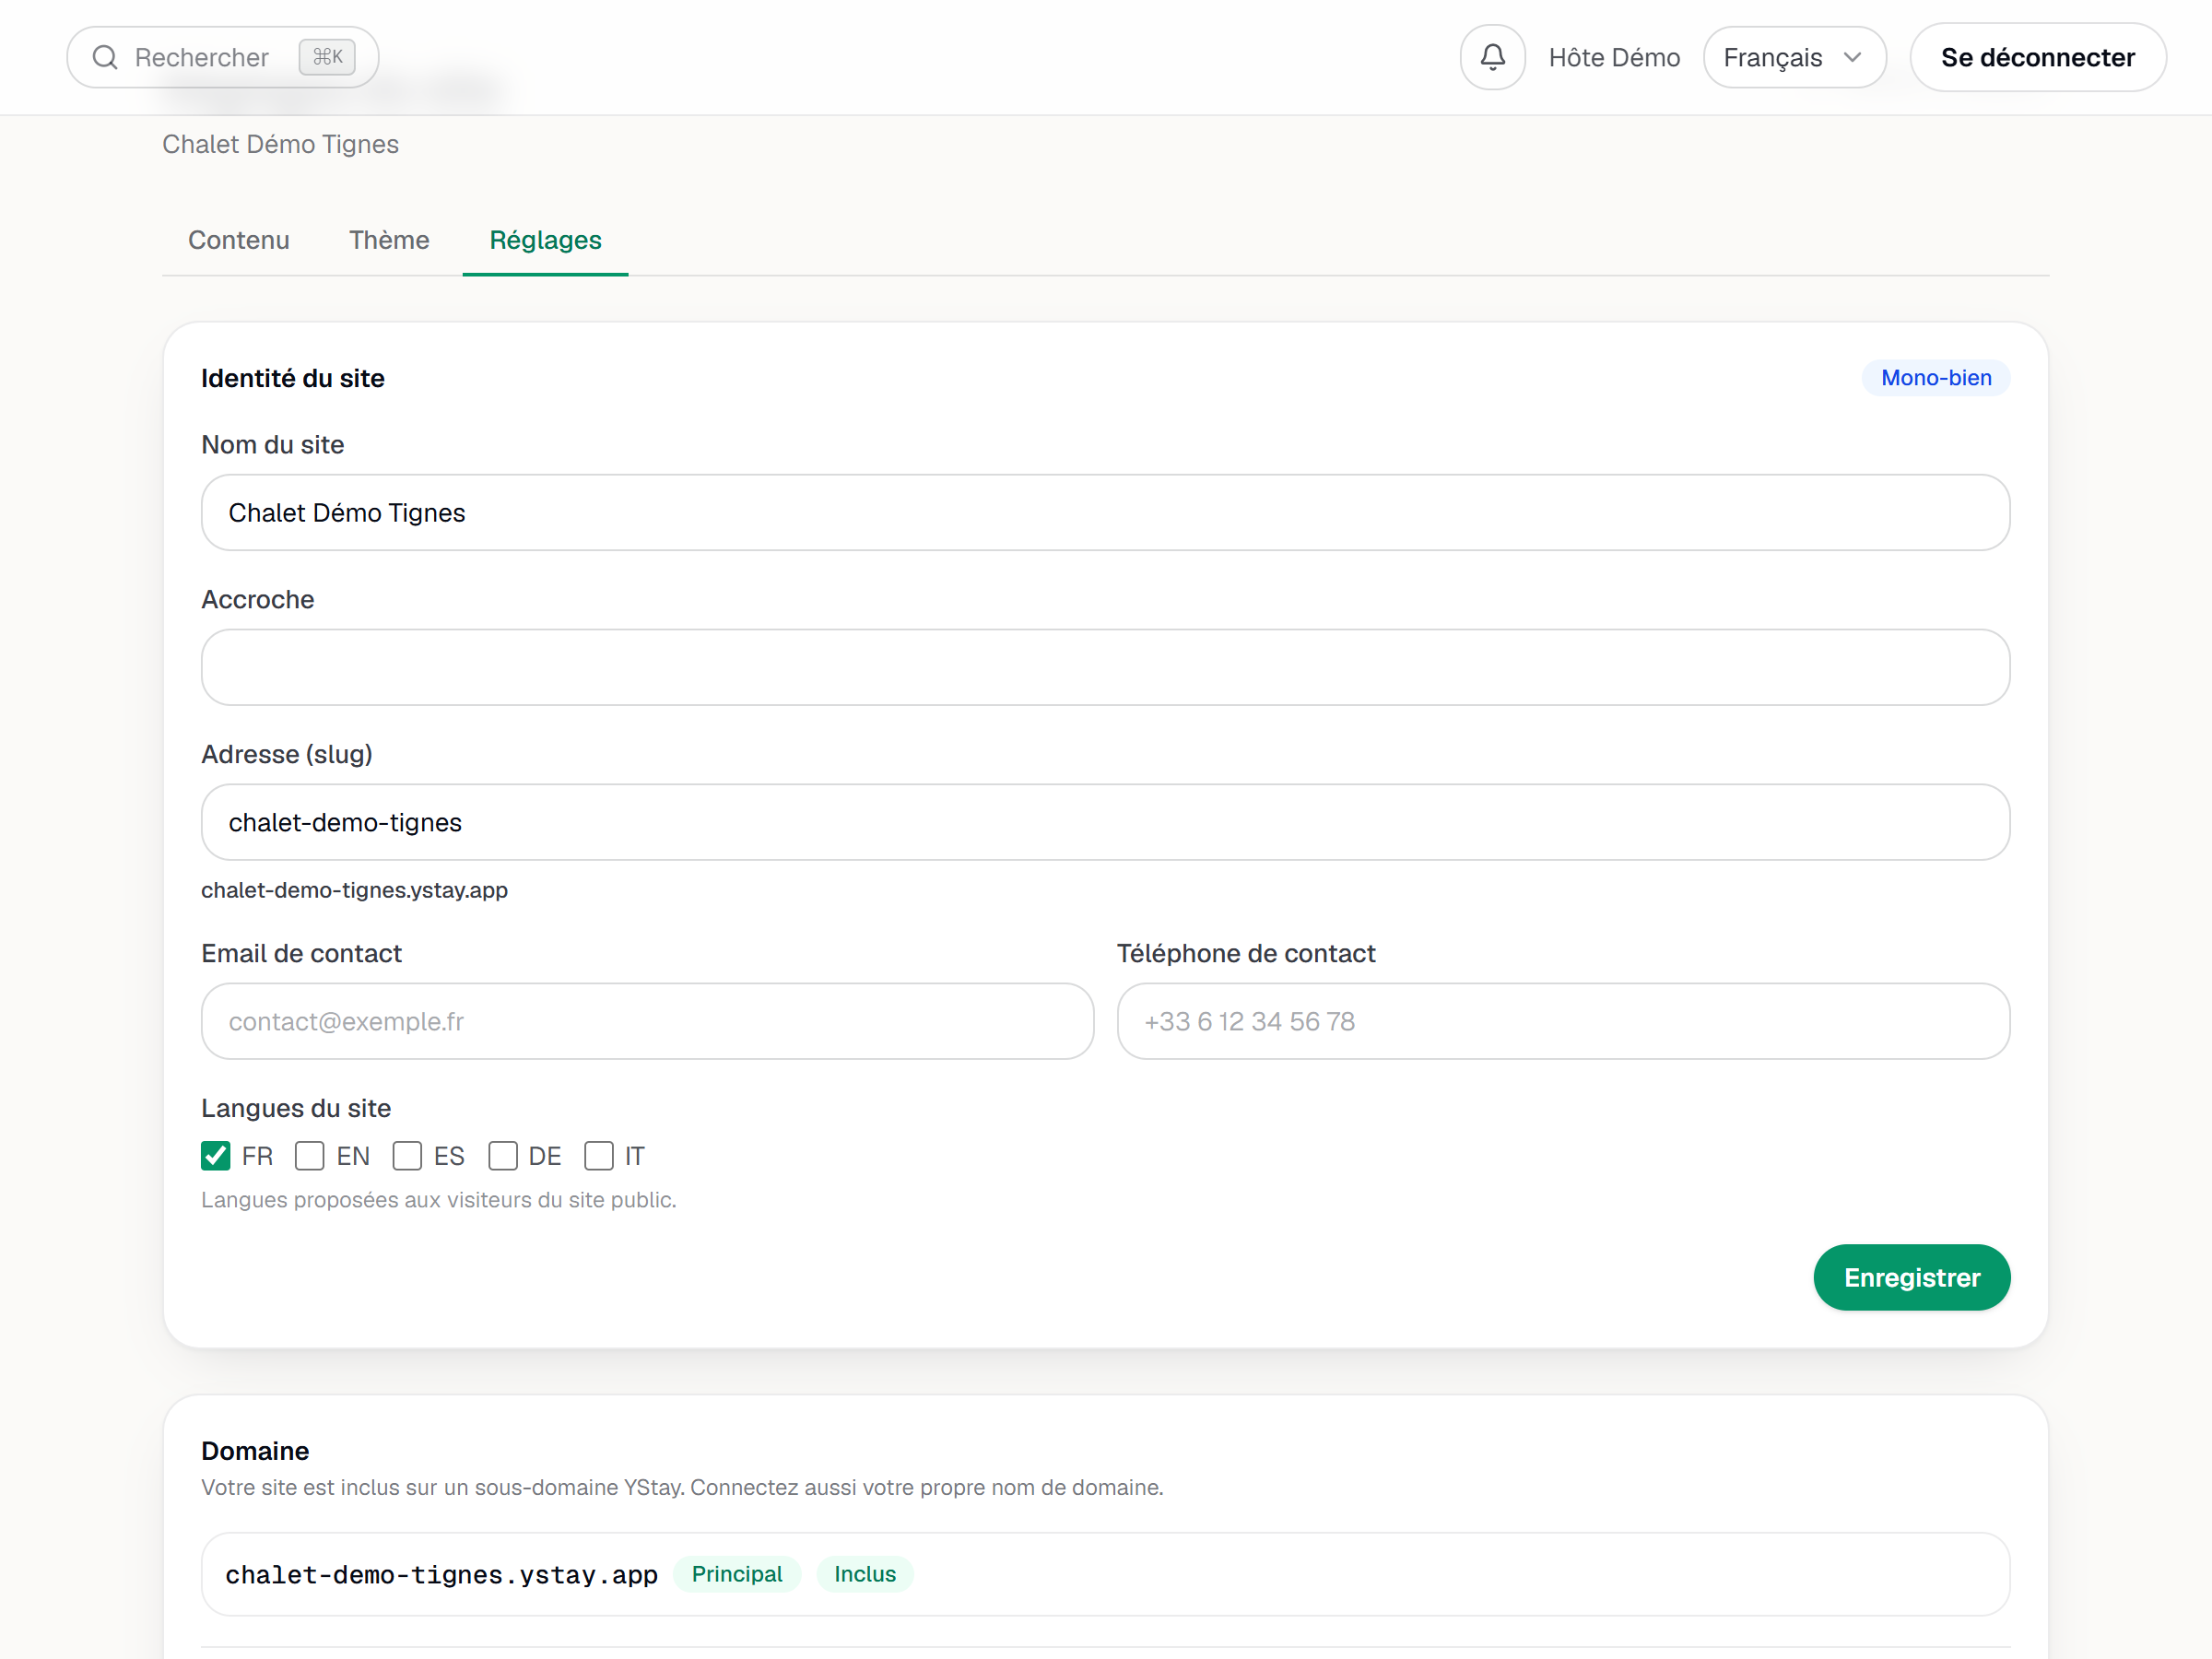
The site settings: the slug and the preview of the .ystay.app address. Dress the site
The Theme tab opens Site theme, in two panes: Gallery, where Apply installs a ready-made theme in one go, then Customization for colours, typography, corner radius, logo and favicon. Your listings' photos and texts are not edited here: the site pulls them from the listing each block is bound to.
Connect your own domain
Still under Settings, the Domain card reminds you that “Your site is included on a YStay subdomain. You can also connect your own domain name.” That subdomain sits at the top with an Included badge; it cannot be deleted.
The Add a custom domain field expects a domain you already own — “A domain you own, e.g. bookings.my-domain.com.” — then Add. YStay then shows “DNS setup required” and asks you to “Create these two records at your domain registrar:” a TXT on
_ystay-verify.your-domain.com, carrying the verification token, and a CNAME on the domain itself. The table has three columns — Type, Host, Value — and every cell copies with one click: carry over the value shown on screen, never one retyped from memory.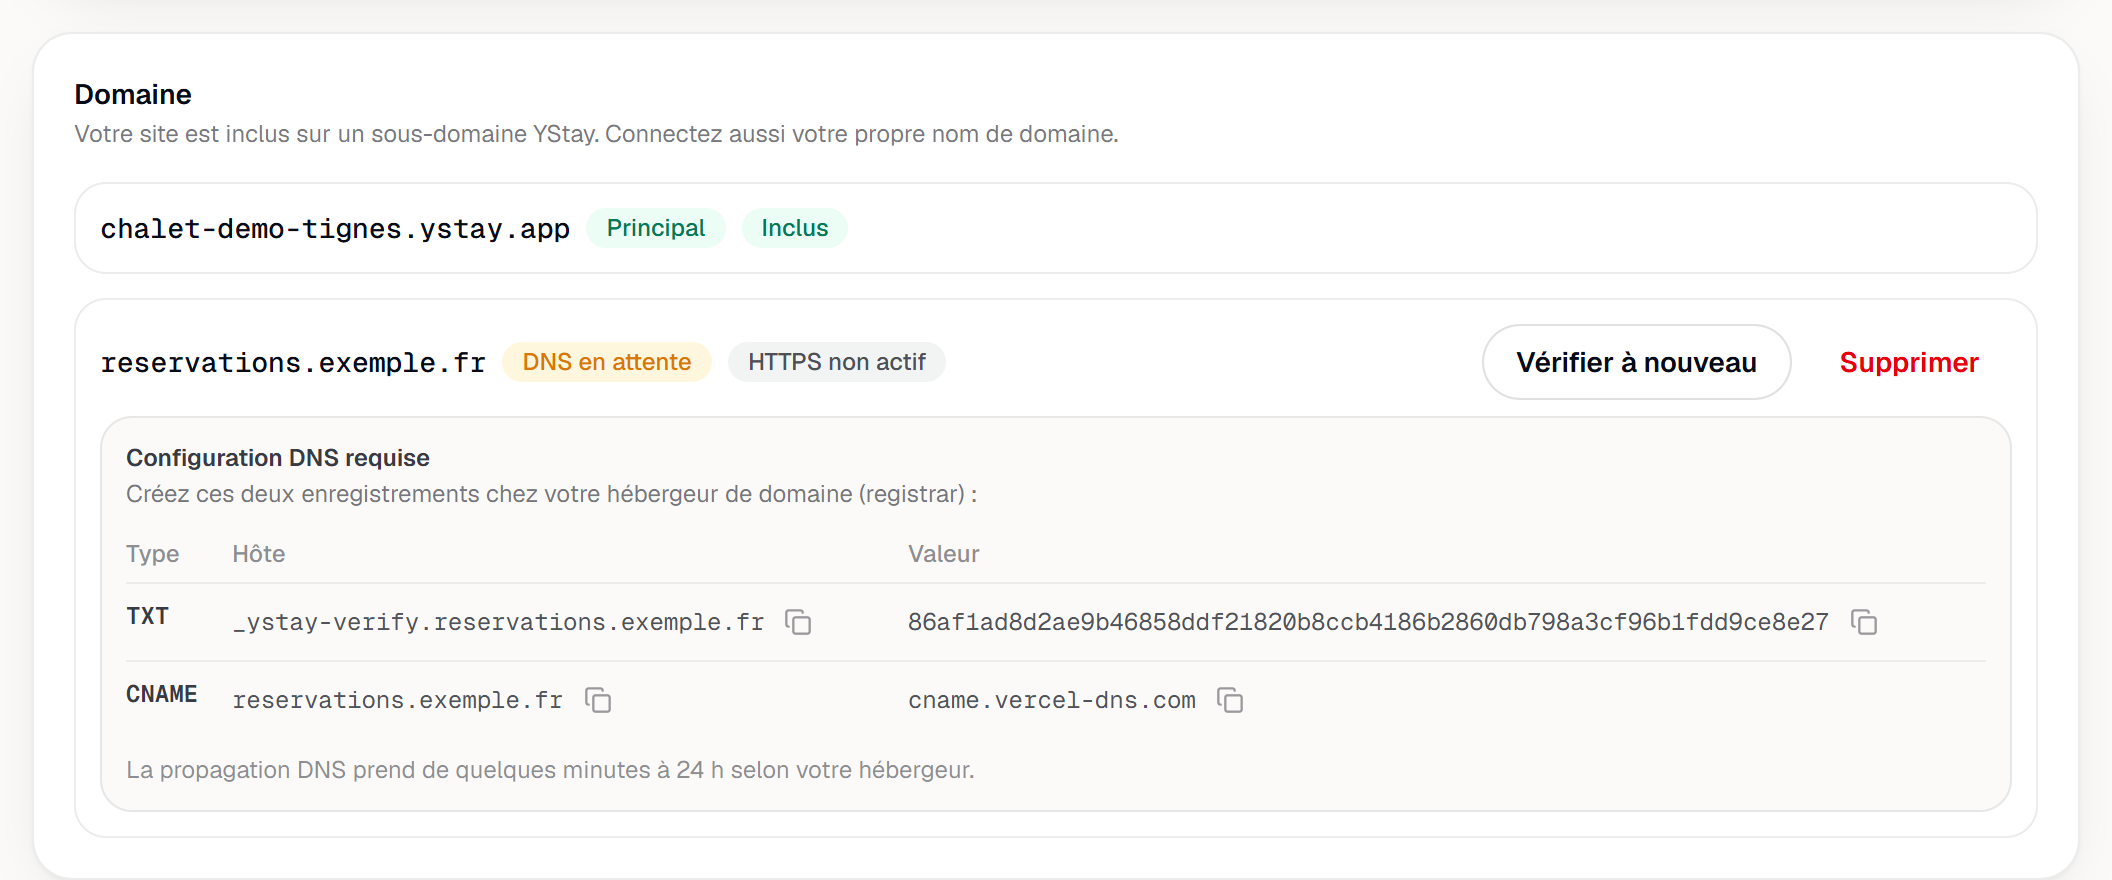
Adding a custom domain and the two DNS records to create (TXT and CNAME). Get the domain verified
Once both records are in place, Verify again starts the check. It is not instant: YStay goes back in the background and refreshes the badges. The first one tracks DNS — DNS pending, DNS verified or DNS failed — the second one the certificate: HTTPS not active, Certificate in progress, HTTPS active or Certificate error. Once the domain is verified, the DNS instructions disappear and Set as primary shows up: “Canonical (SEO) URLs of the published site will use this domain.”
Publish
Publishing is an explicit act: the Publish button in the Studio bar freezes a numbered snapshot of the site. Later edits go back into the draft until the next publication, and every publication creates a new version. The success banner names the version and the date, and offers View published site. If nothing has changed since last time, the button reads Nothing to publish and stays disabled.
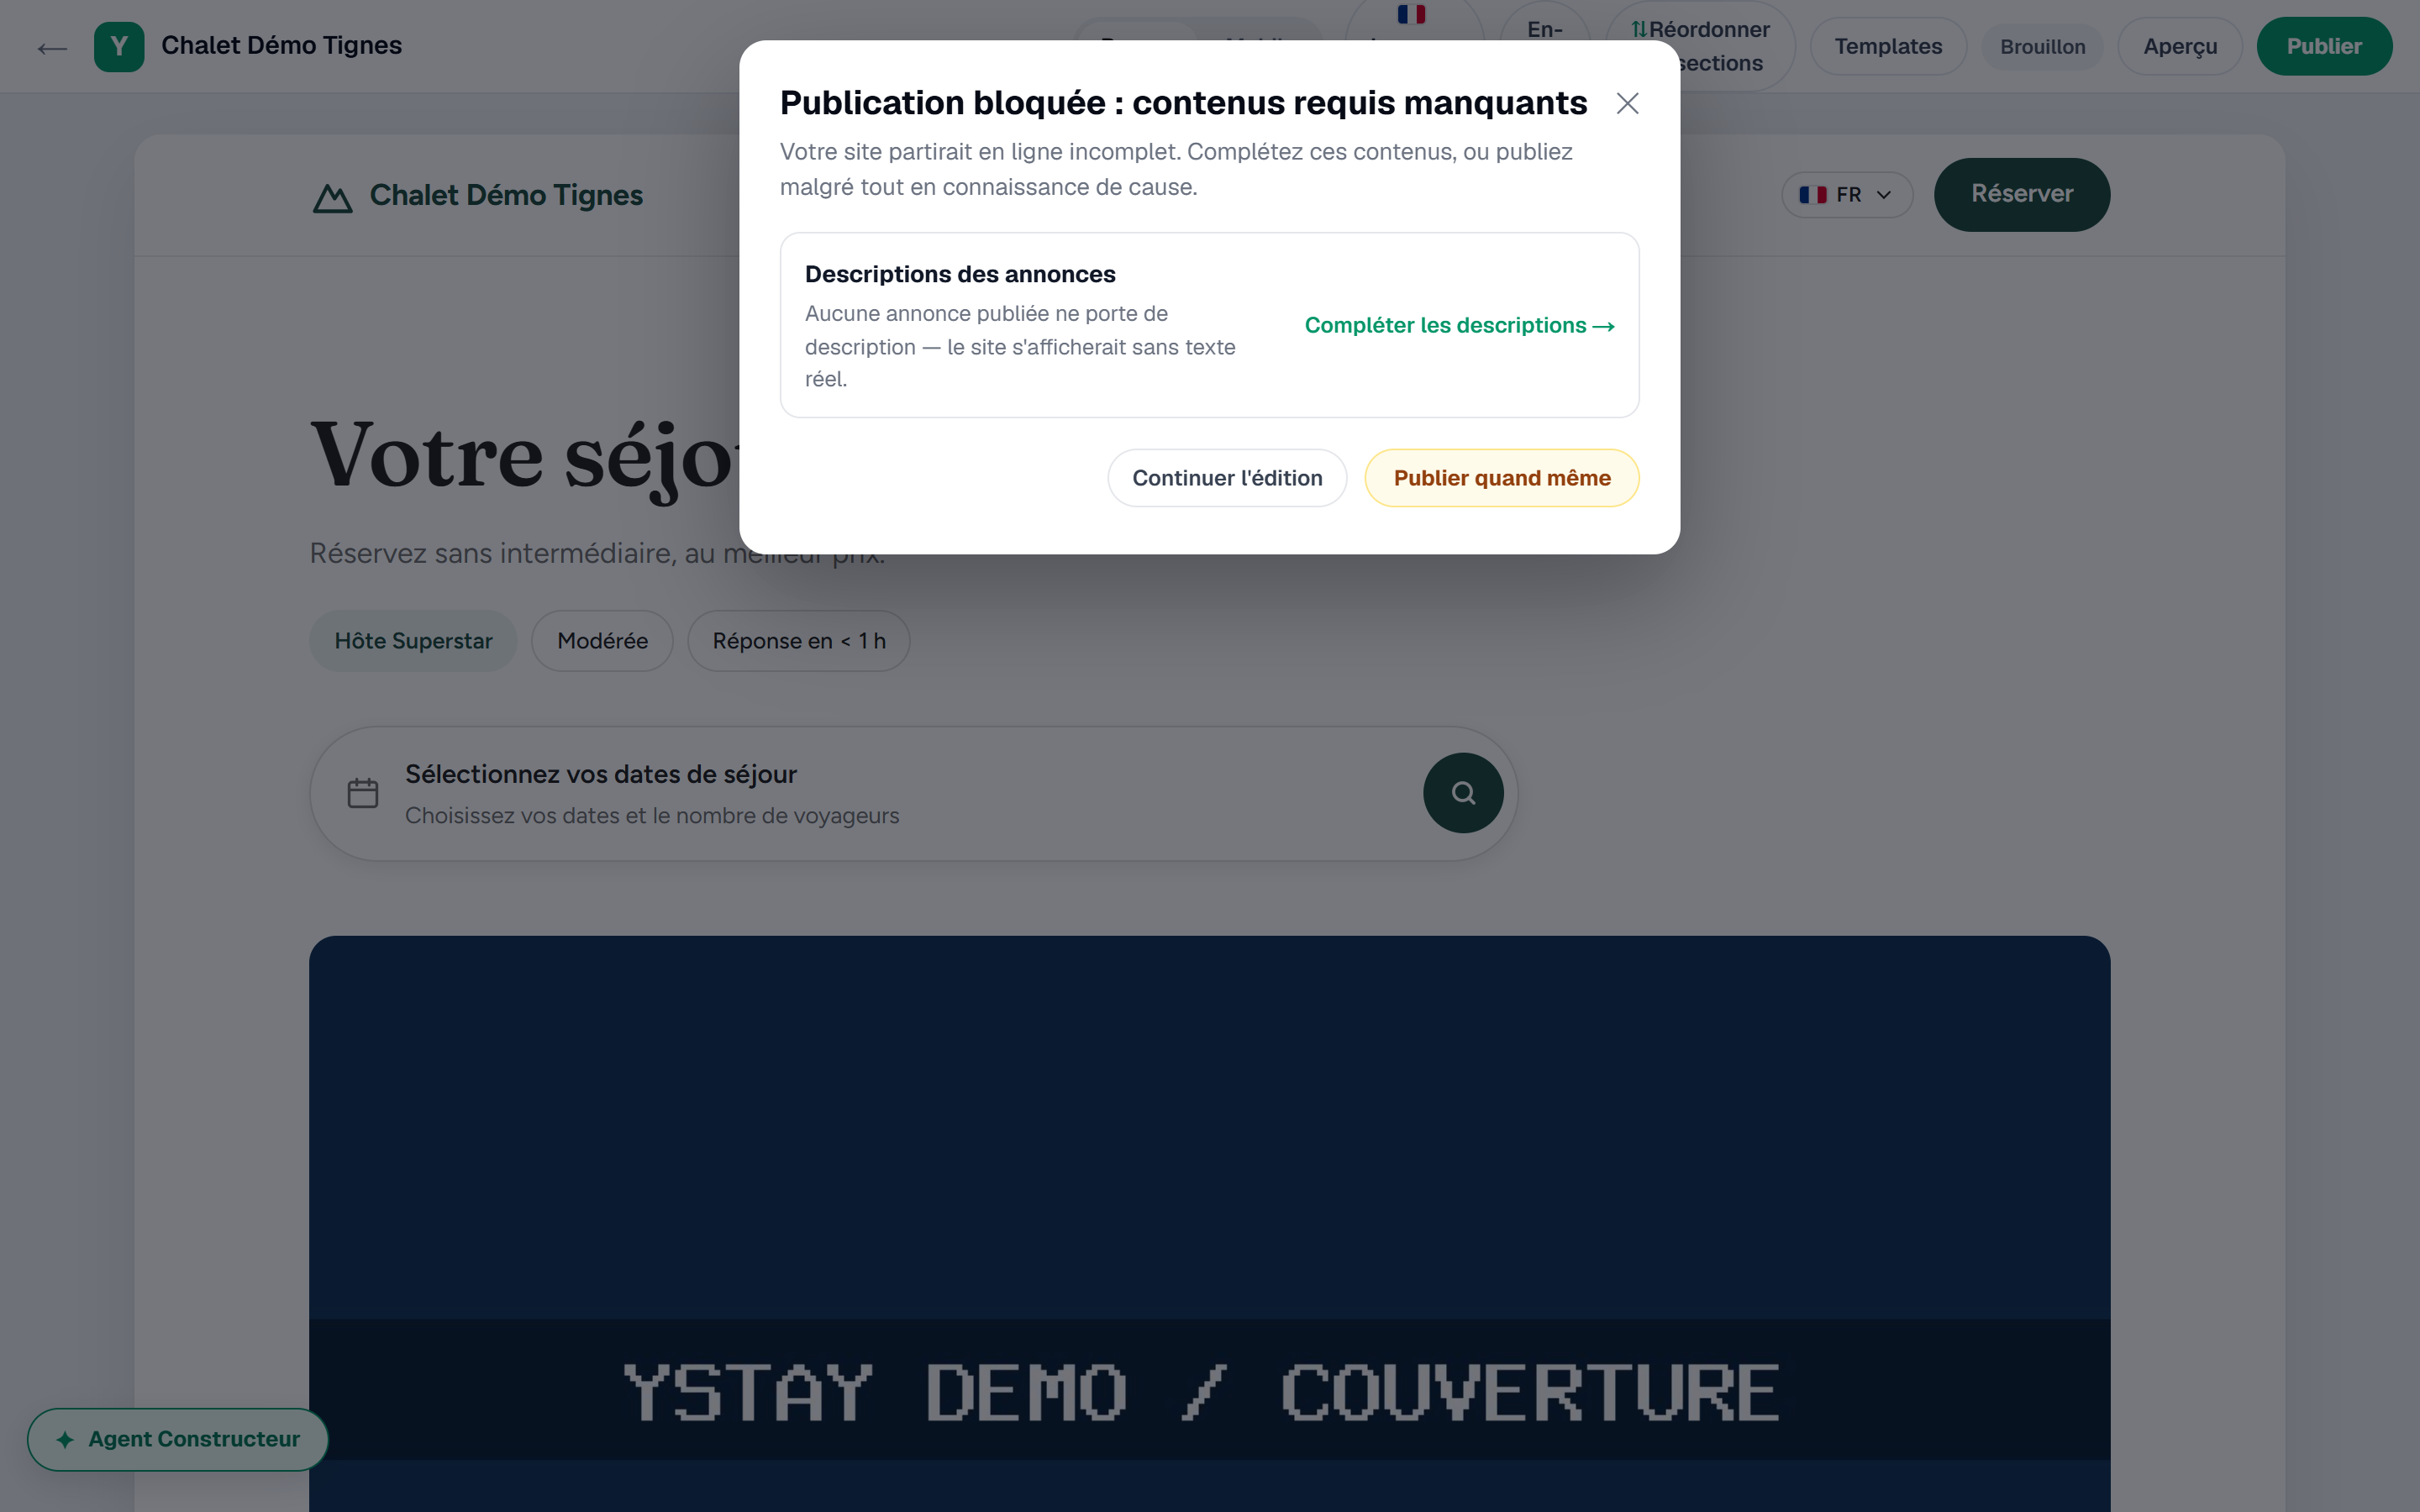
The Publish button and the guard shown when a prerequisite is missing.
If publishing is refused
- “Publishing blocked: required content is missing”. The dialog lists what is missing — photo, description or address — on your published listings, not on the site. Keep editing sends you back to fix it, Publish anyway goes through.
- “Connect your payments (Stripe) to publish a site with online booking.” A visible page carries an active booking block while your payments are not open: enable them, or switch the block off and publish a purely showcase site.
- The button reads “Nothing to publish”. The live version already matches your draft; change something and it becomes clickable again.
- “DNS failed”. The domain row adds Failed: followed by the reason returned. Check both records at your registrar, then run Verify again.
- The “Live · outside Studio” badge. The site is public but was put online before Studio: publishing replaces what is being served today.
- The public sees a closed page while your badge says “Live”. A site can be withdrawn by the platform: that withdrawal closes the public page without unpublishing the site, so your Studio badge may keep showing Live. In that case, contact support.
Already have a site elsewhere?
The Embed on my site card, at the bottom of Site settings, is a separate
route: it generates an <iframe> to paste into an existing site (WordPress, Wix,
Squarespace…) so it shows the booking page of a published listing. No YStay site is
needed, and the link points to a page that is already public.
Next
- Enable payments (Stripe) — the condition for publishing a page that takes bookings.
- Take your first reservation — what happens once the site is live.
- Listings — fill in photos, descriptions and address, exactly what the publishing guard looks at.
- Connect your distribution channels — the platforms that come on top of your direct bookings.
- Translate and distribute the listing — the languages your site will present the listing in.
Updated on