Create your account and your first listing
From sign-up to going live: every screen, the fields you will be asked for, and the guard that holds the Publish button back.
This guide covers a host's very first run through YStay: opening an account, then taking a listing all the way to publication. Allow about twenty minutes if your photos are ready. Nothing has to be done in one sitting — the Getting started card on the dashboard remembers where you stopped.
Three objects are created one after the other, and the order is not negotiable: a property (the address, the building), then a unit inside it (what you actually rent out), then a listing attached to that unit (what travellers see).
The path, screen by screen
Create your account
Open the Create an account page. Six fields, in this order: Name, Email, Default language, the You are: choice (An individual or A professional / company), Password and Confirm password. The Create my account button submits the lot.
Default language is the language of your dashboard. You can change it later from your account, with no effect on your data.
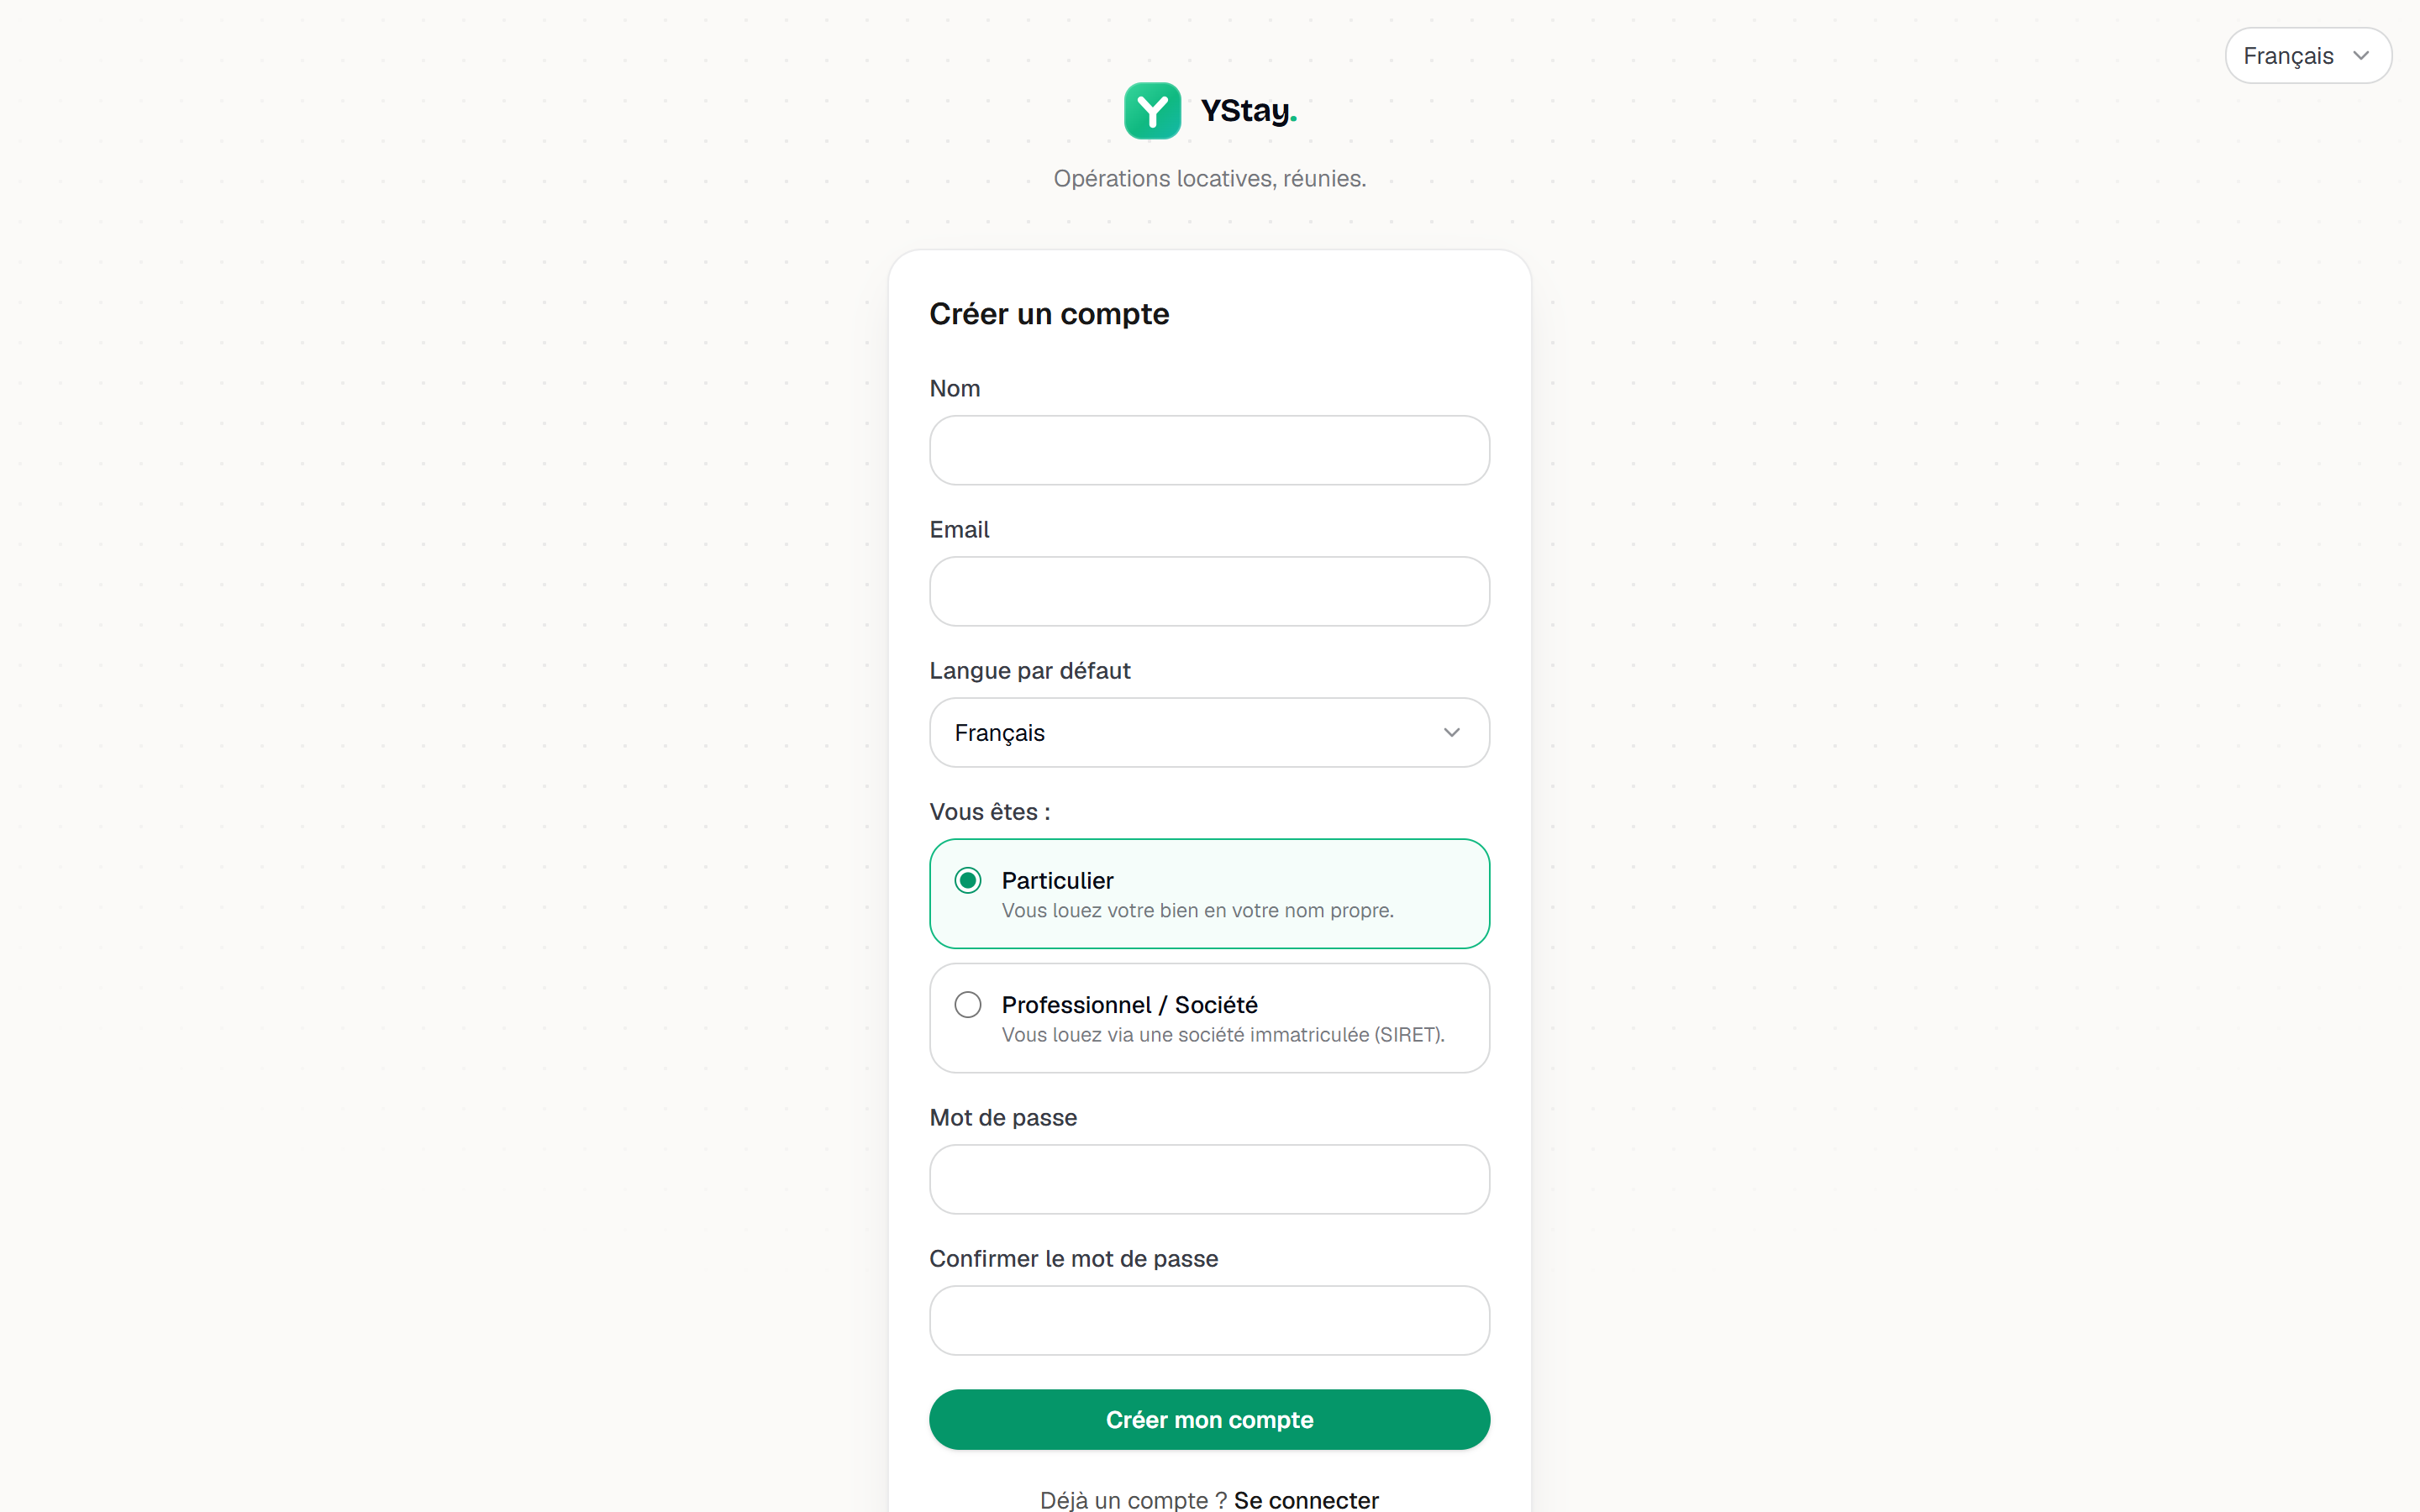
The full “Create an account” form, with the individual / professional choice visible. Verify your email address
YStay sends a verification email to the address you entered. Its link opens the Email verification page, which confirms that your address has been verified and offers to take you to the sign-in page.
The link expires. If it no longer works, sign in anyway: the dashboard flags the unverified address and offers Resend verification email.
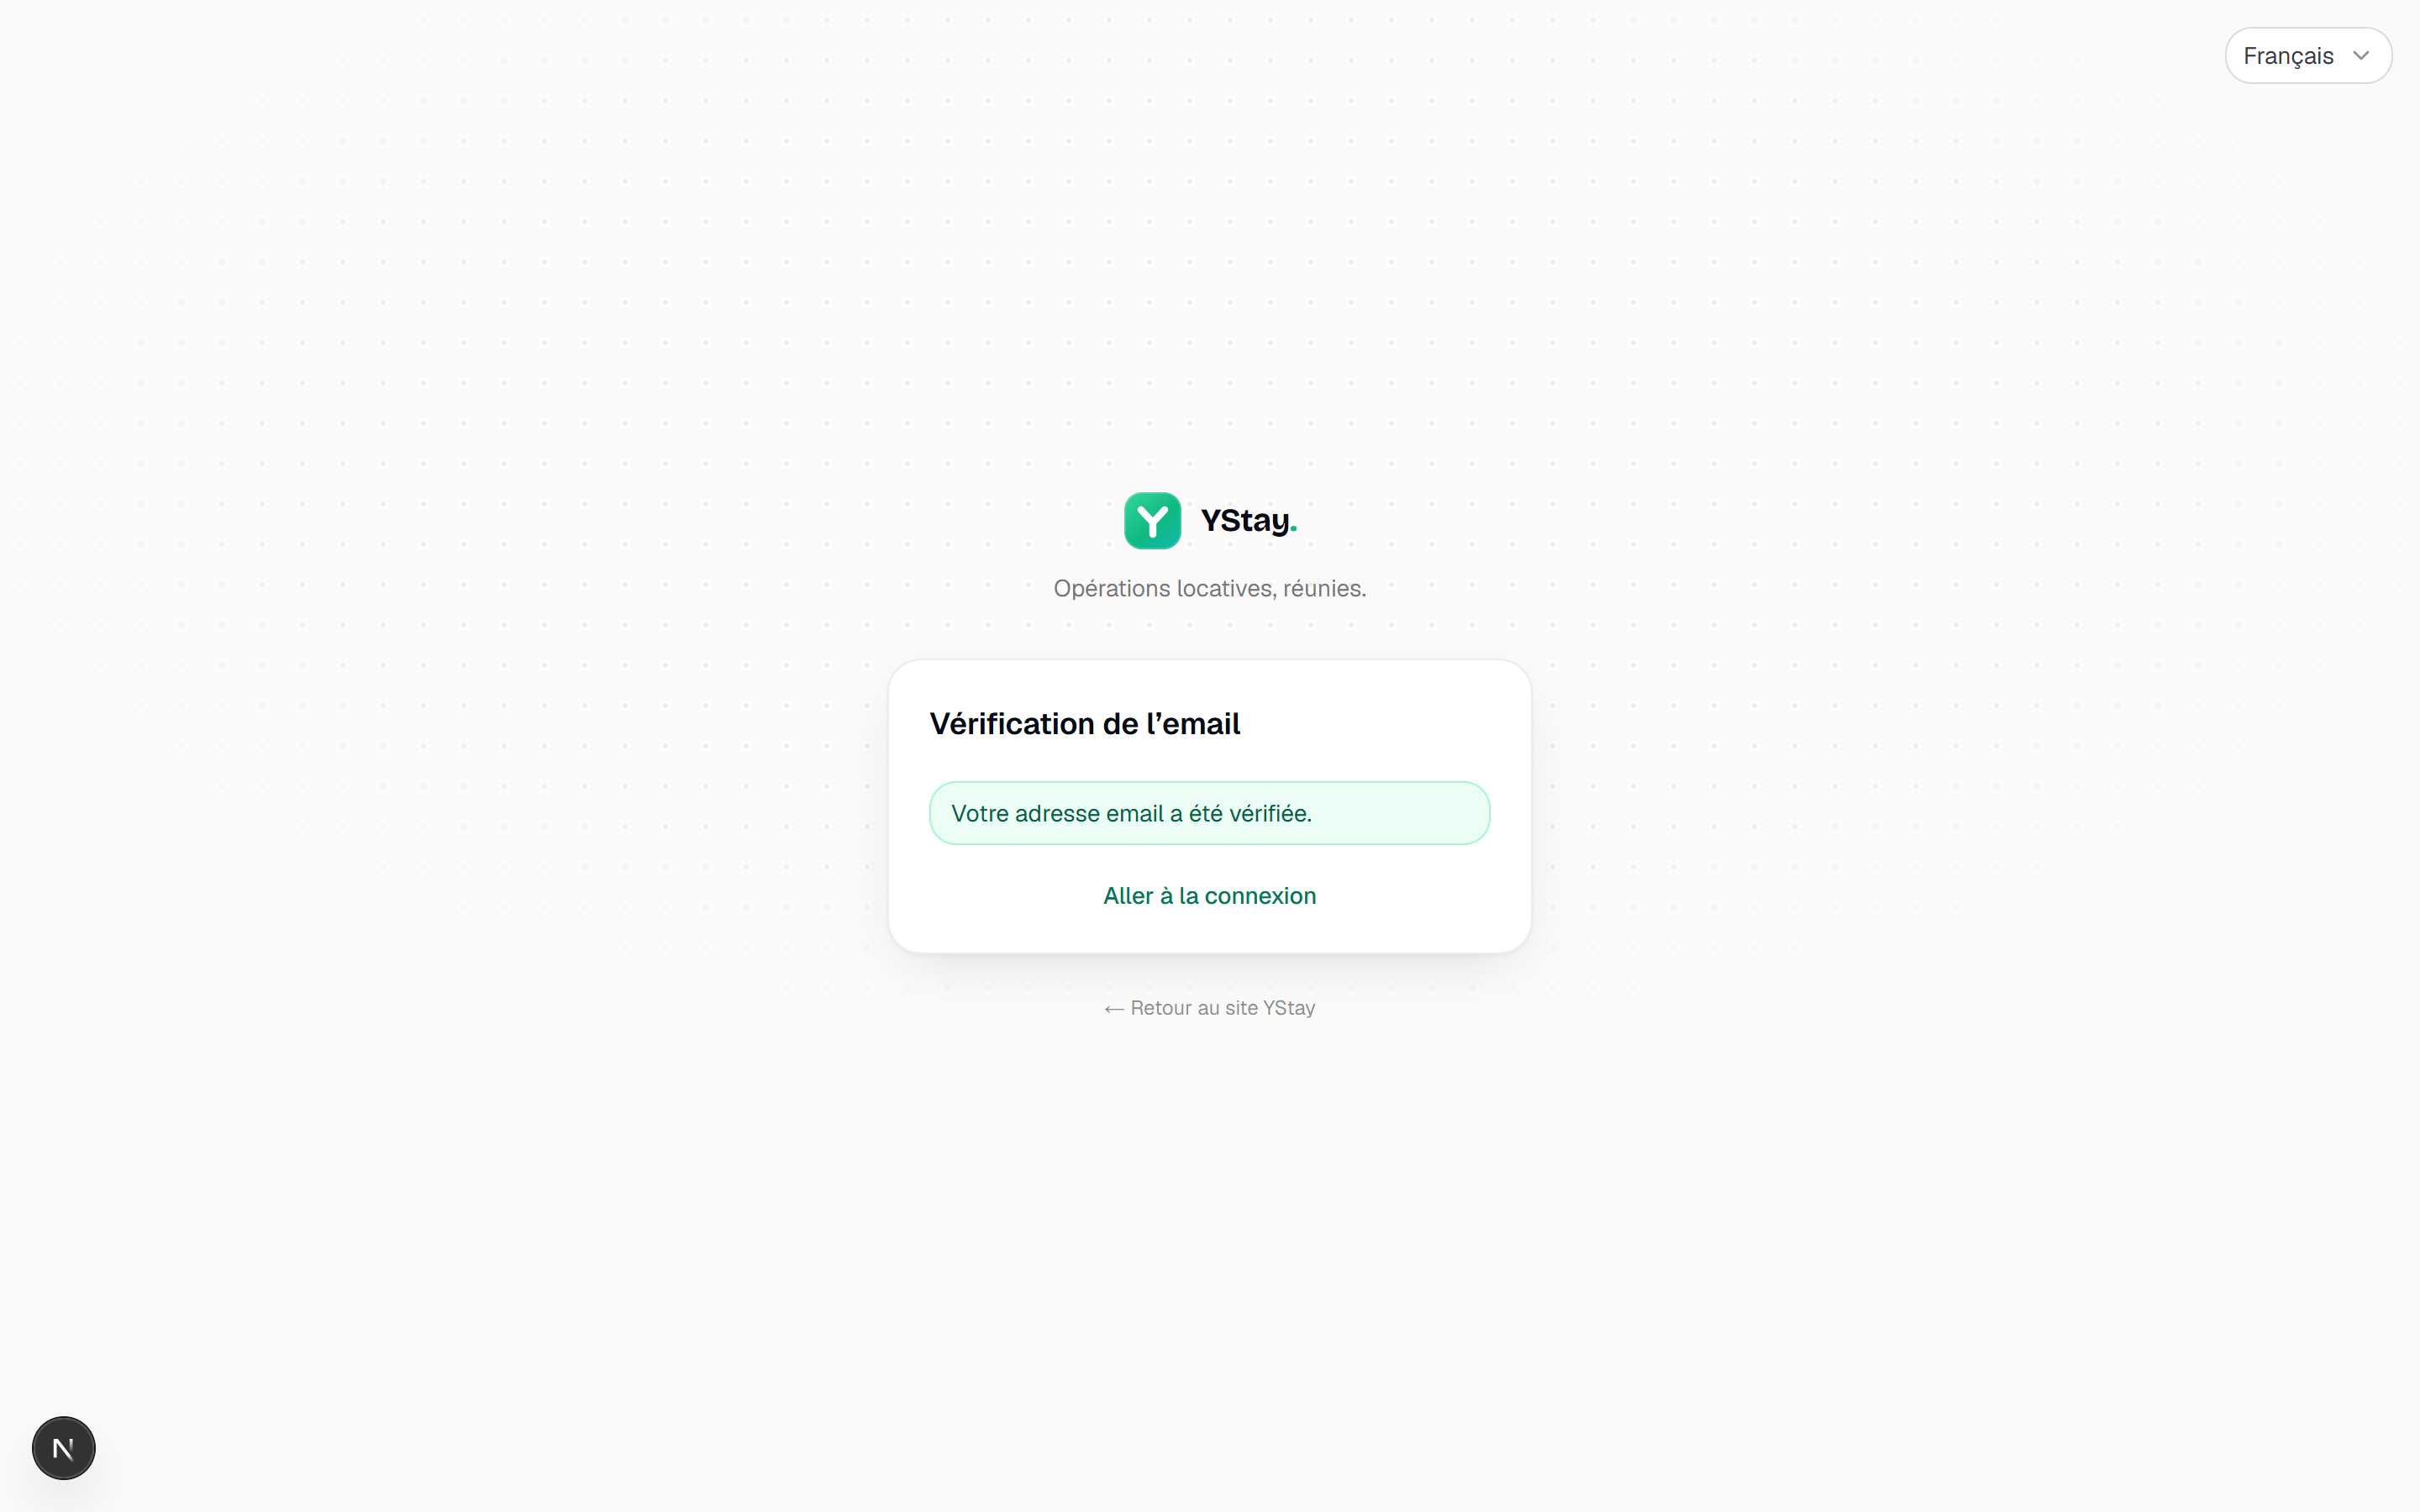
The “Email verification” page in its success state. Create a property
Open Properties, then New property. Three fields only: Property name, City, Country. Create saves it and opens its page.
A property is not rentable in itself: it is the grouping — one address, one building — that your units live under.
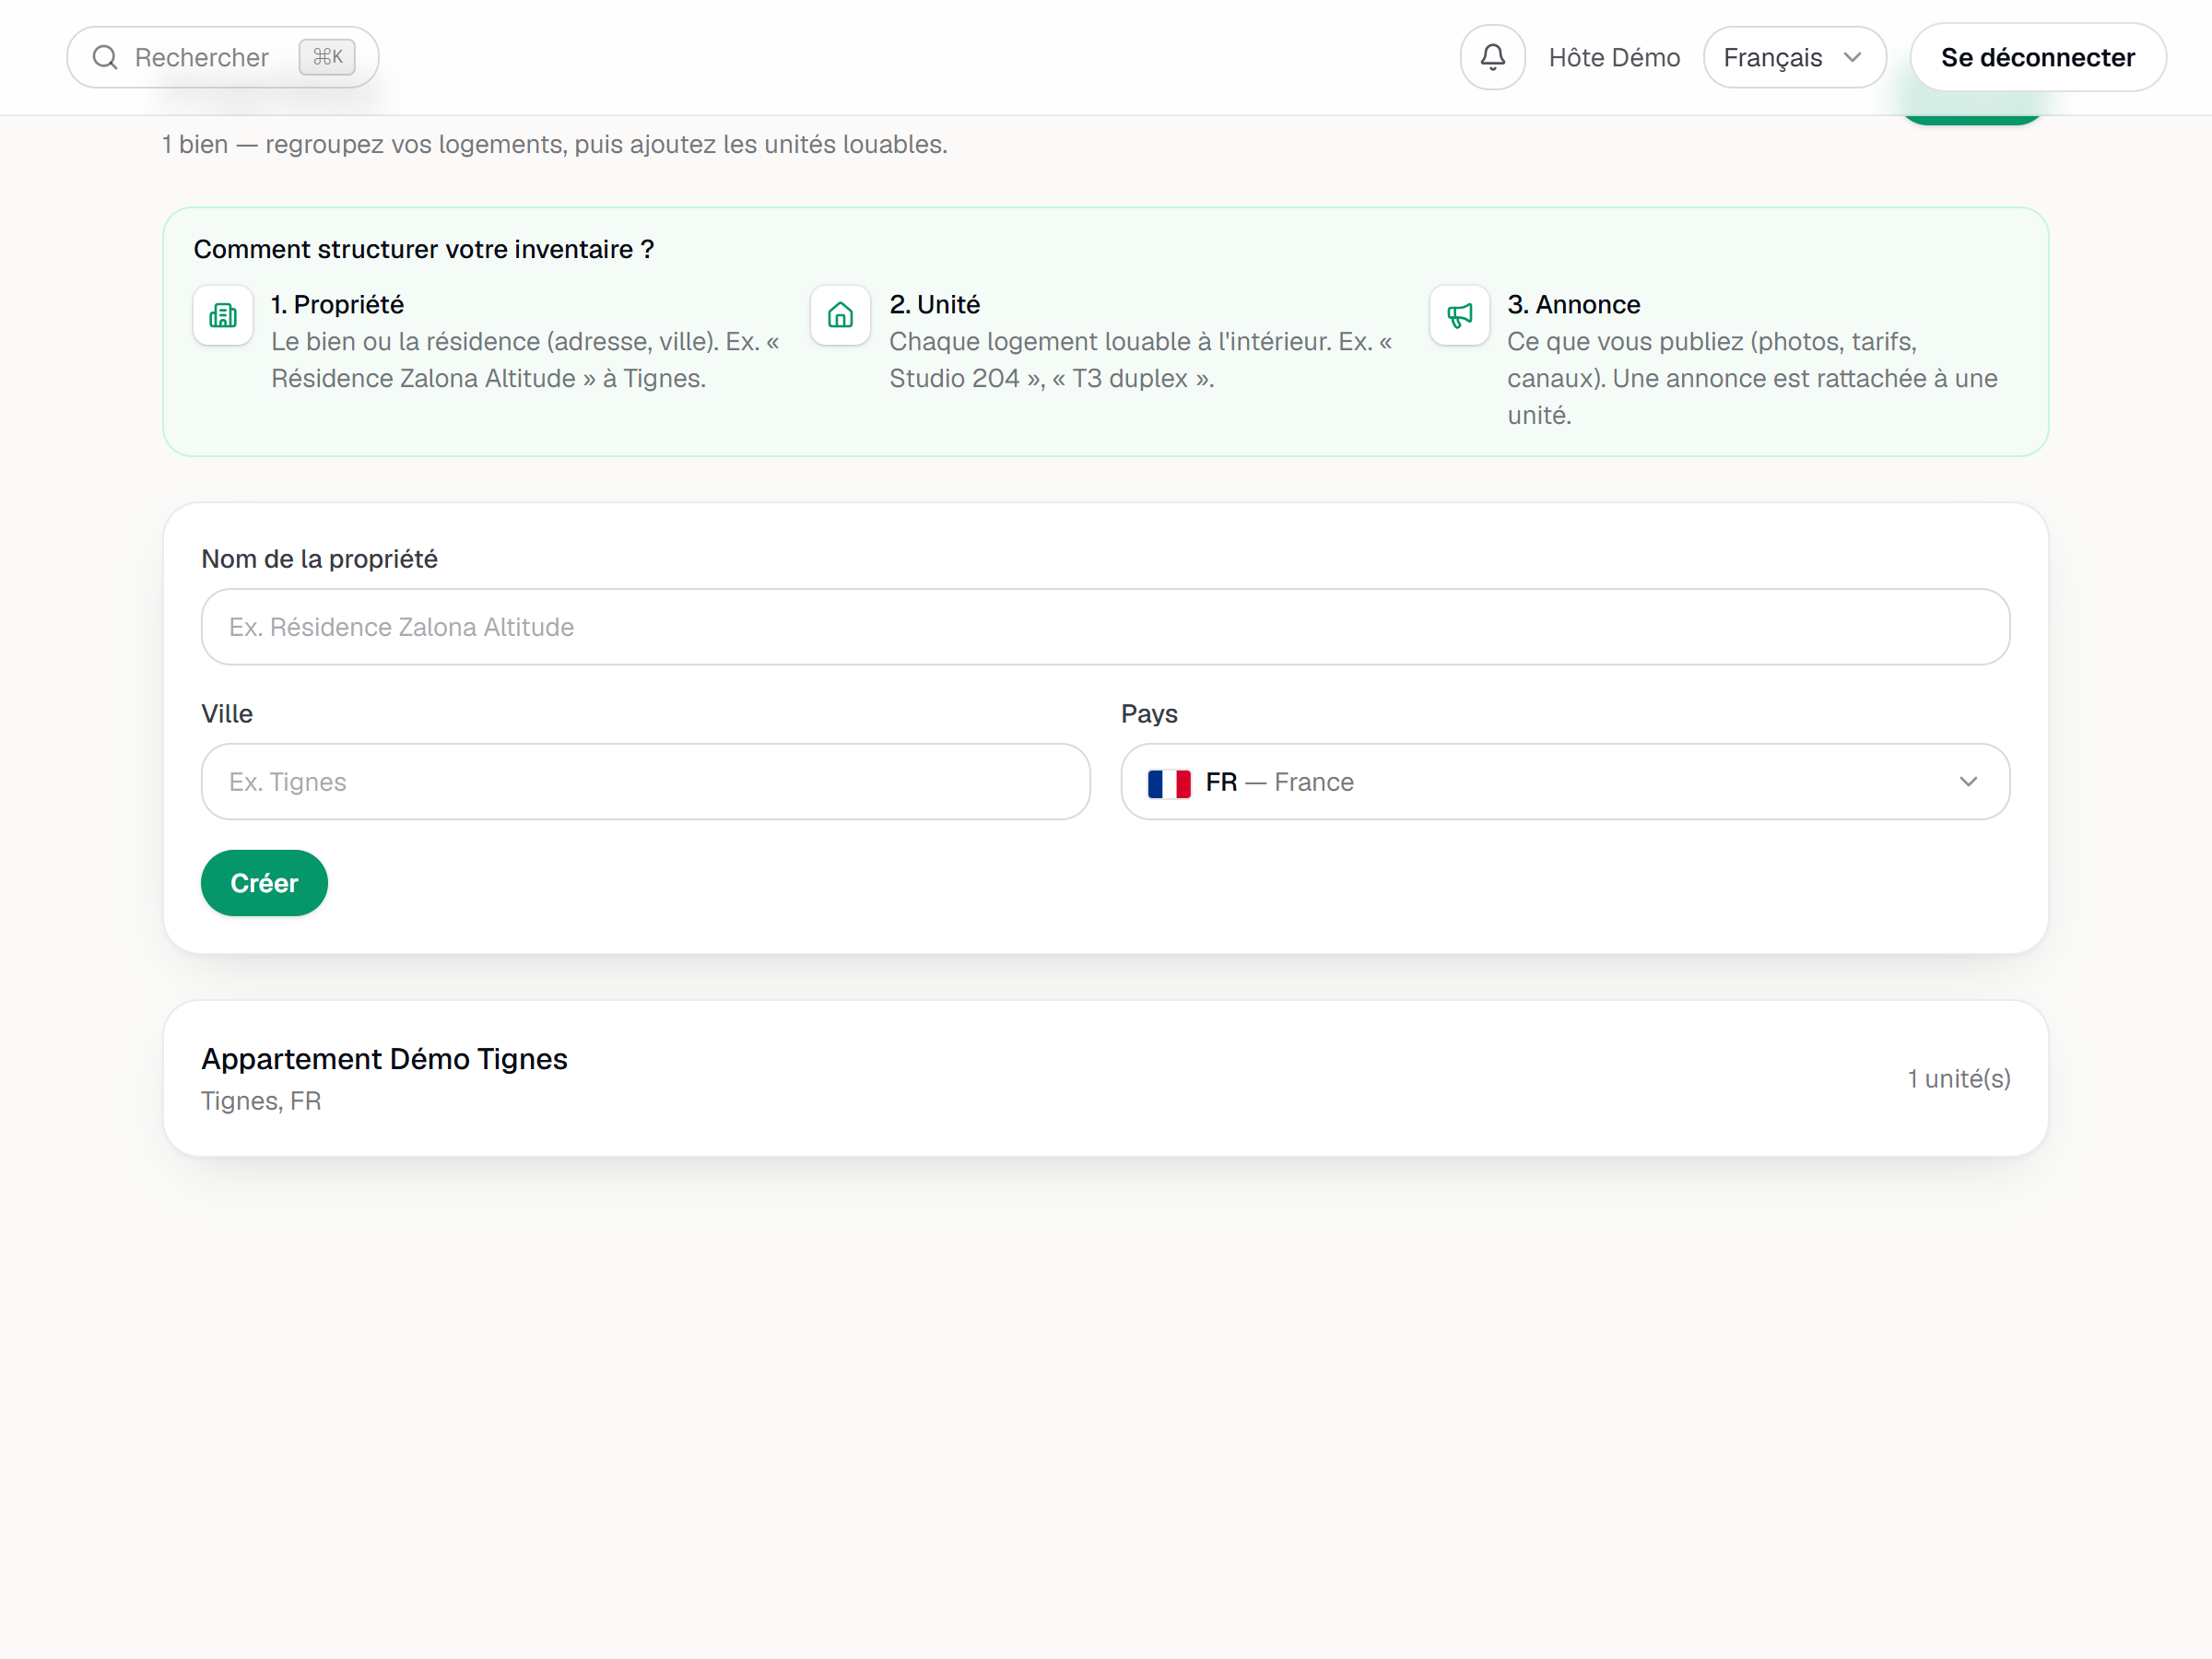
The “New property” form open on the Properties page. Finish setting up your account
Once that first property exists — and not before — the dashboard adds a banner, Finish setting up your account. Its Continue button opens the Set up your account page, whose first step is Complete your profile: account type, business name and address.
None of it blocks what follows, but the information feeds your commercial documents — better entered now than hunted for later.
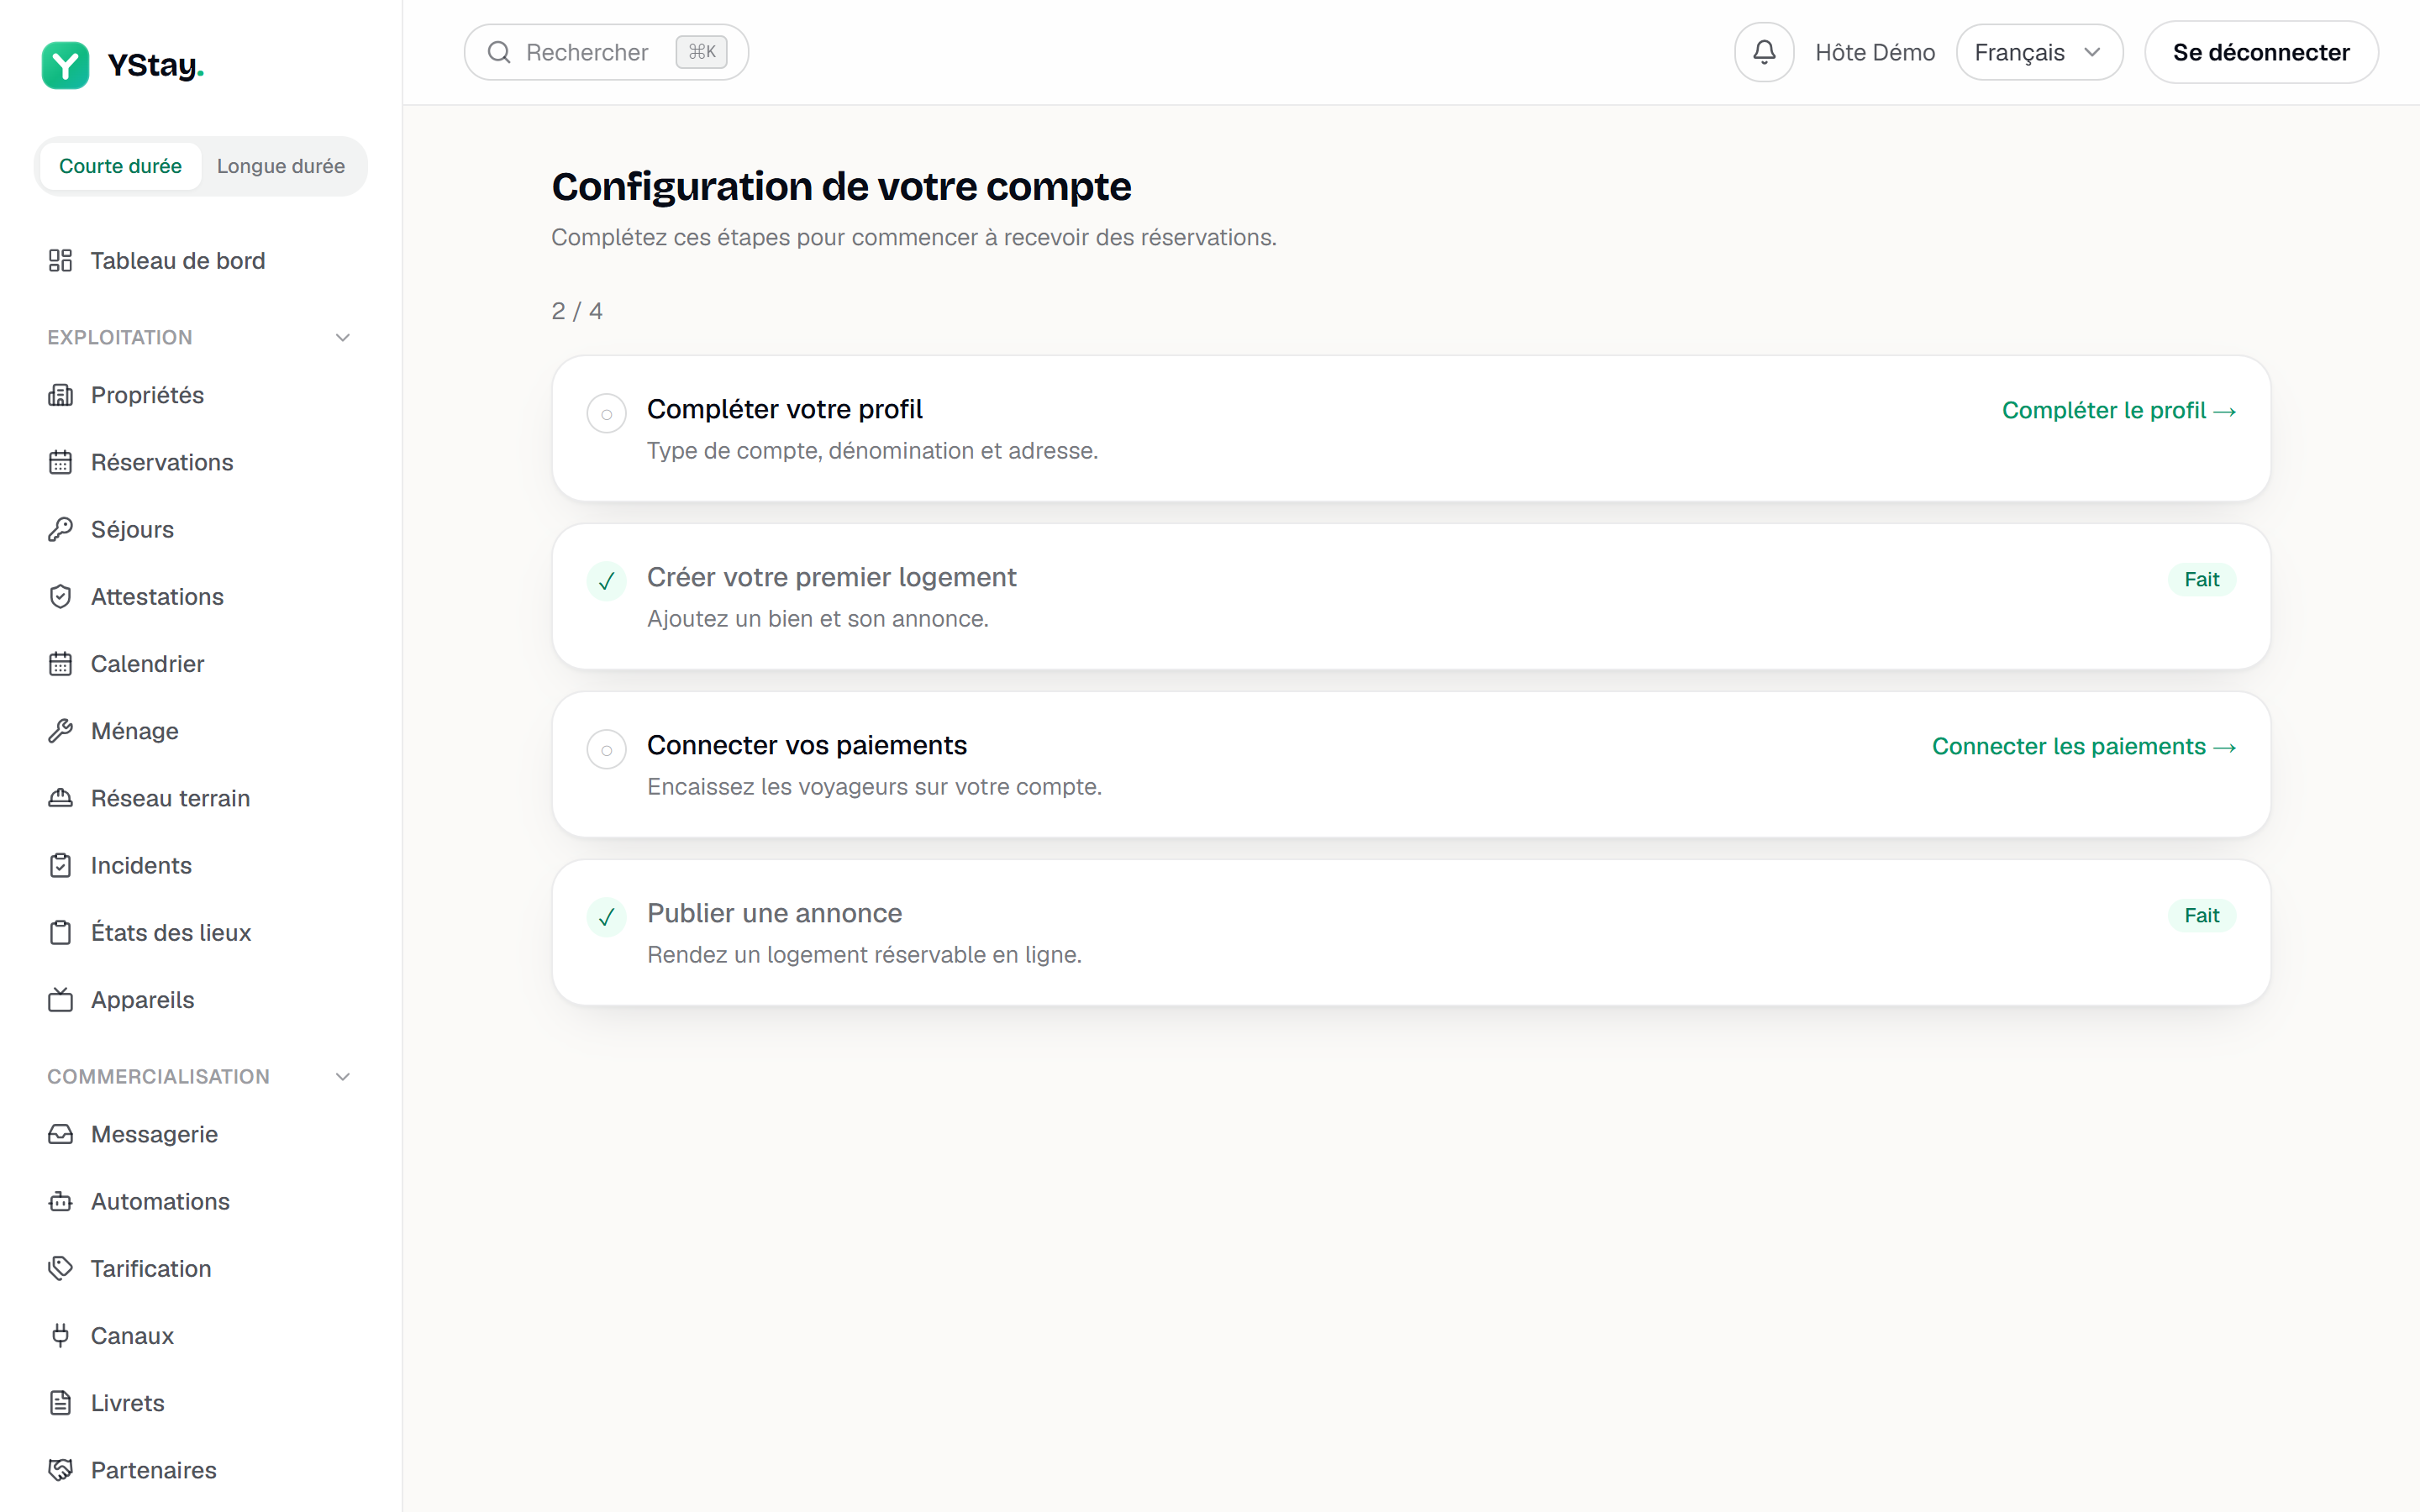
The “Set up your account” page, with “Complete your profile” at the top of the list. Add a unit
On the property page, Add a unit opens the form: Unit name (home), Capacity, Bedrooms, Baths. Add creates it, and it appears under Units.
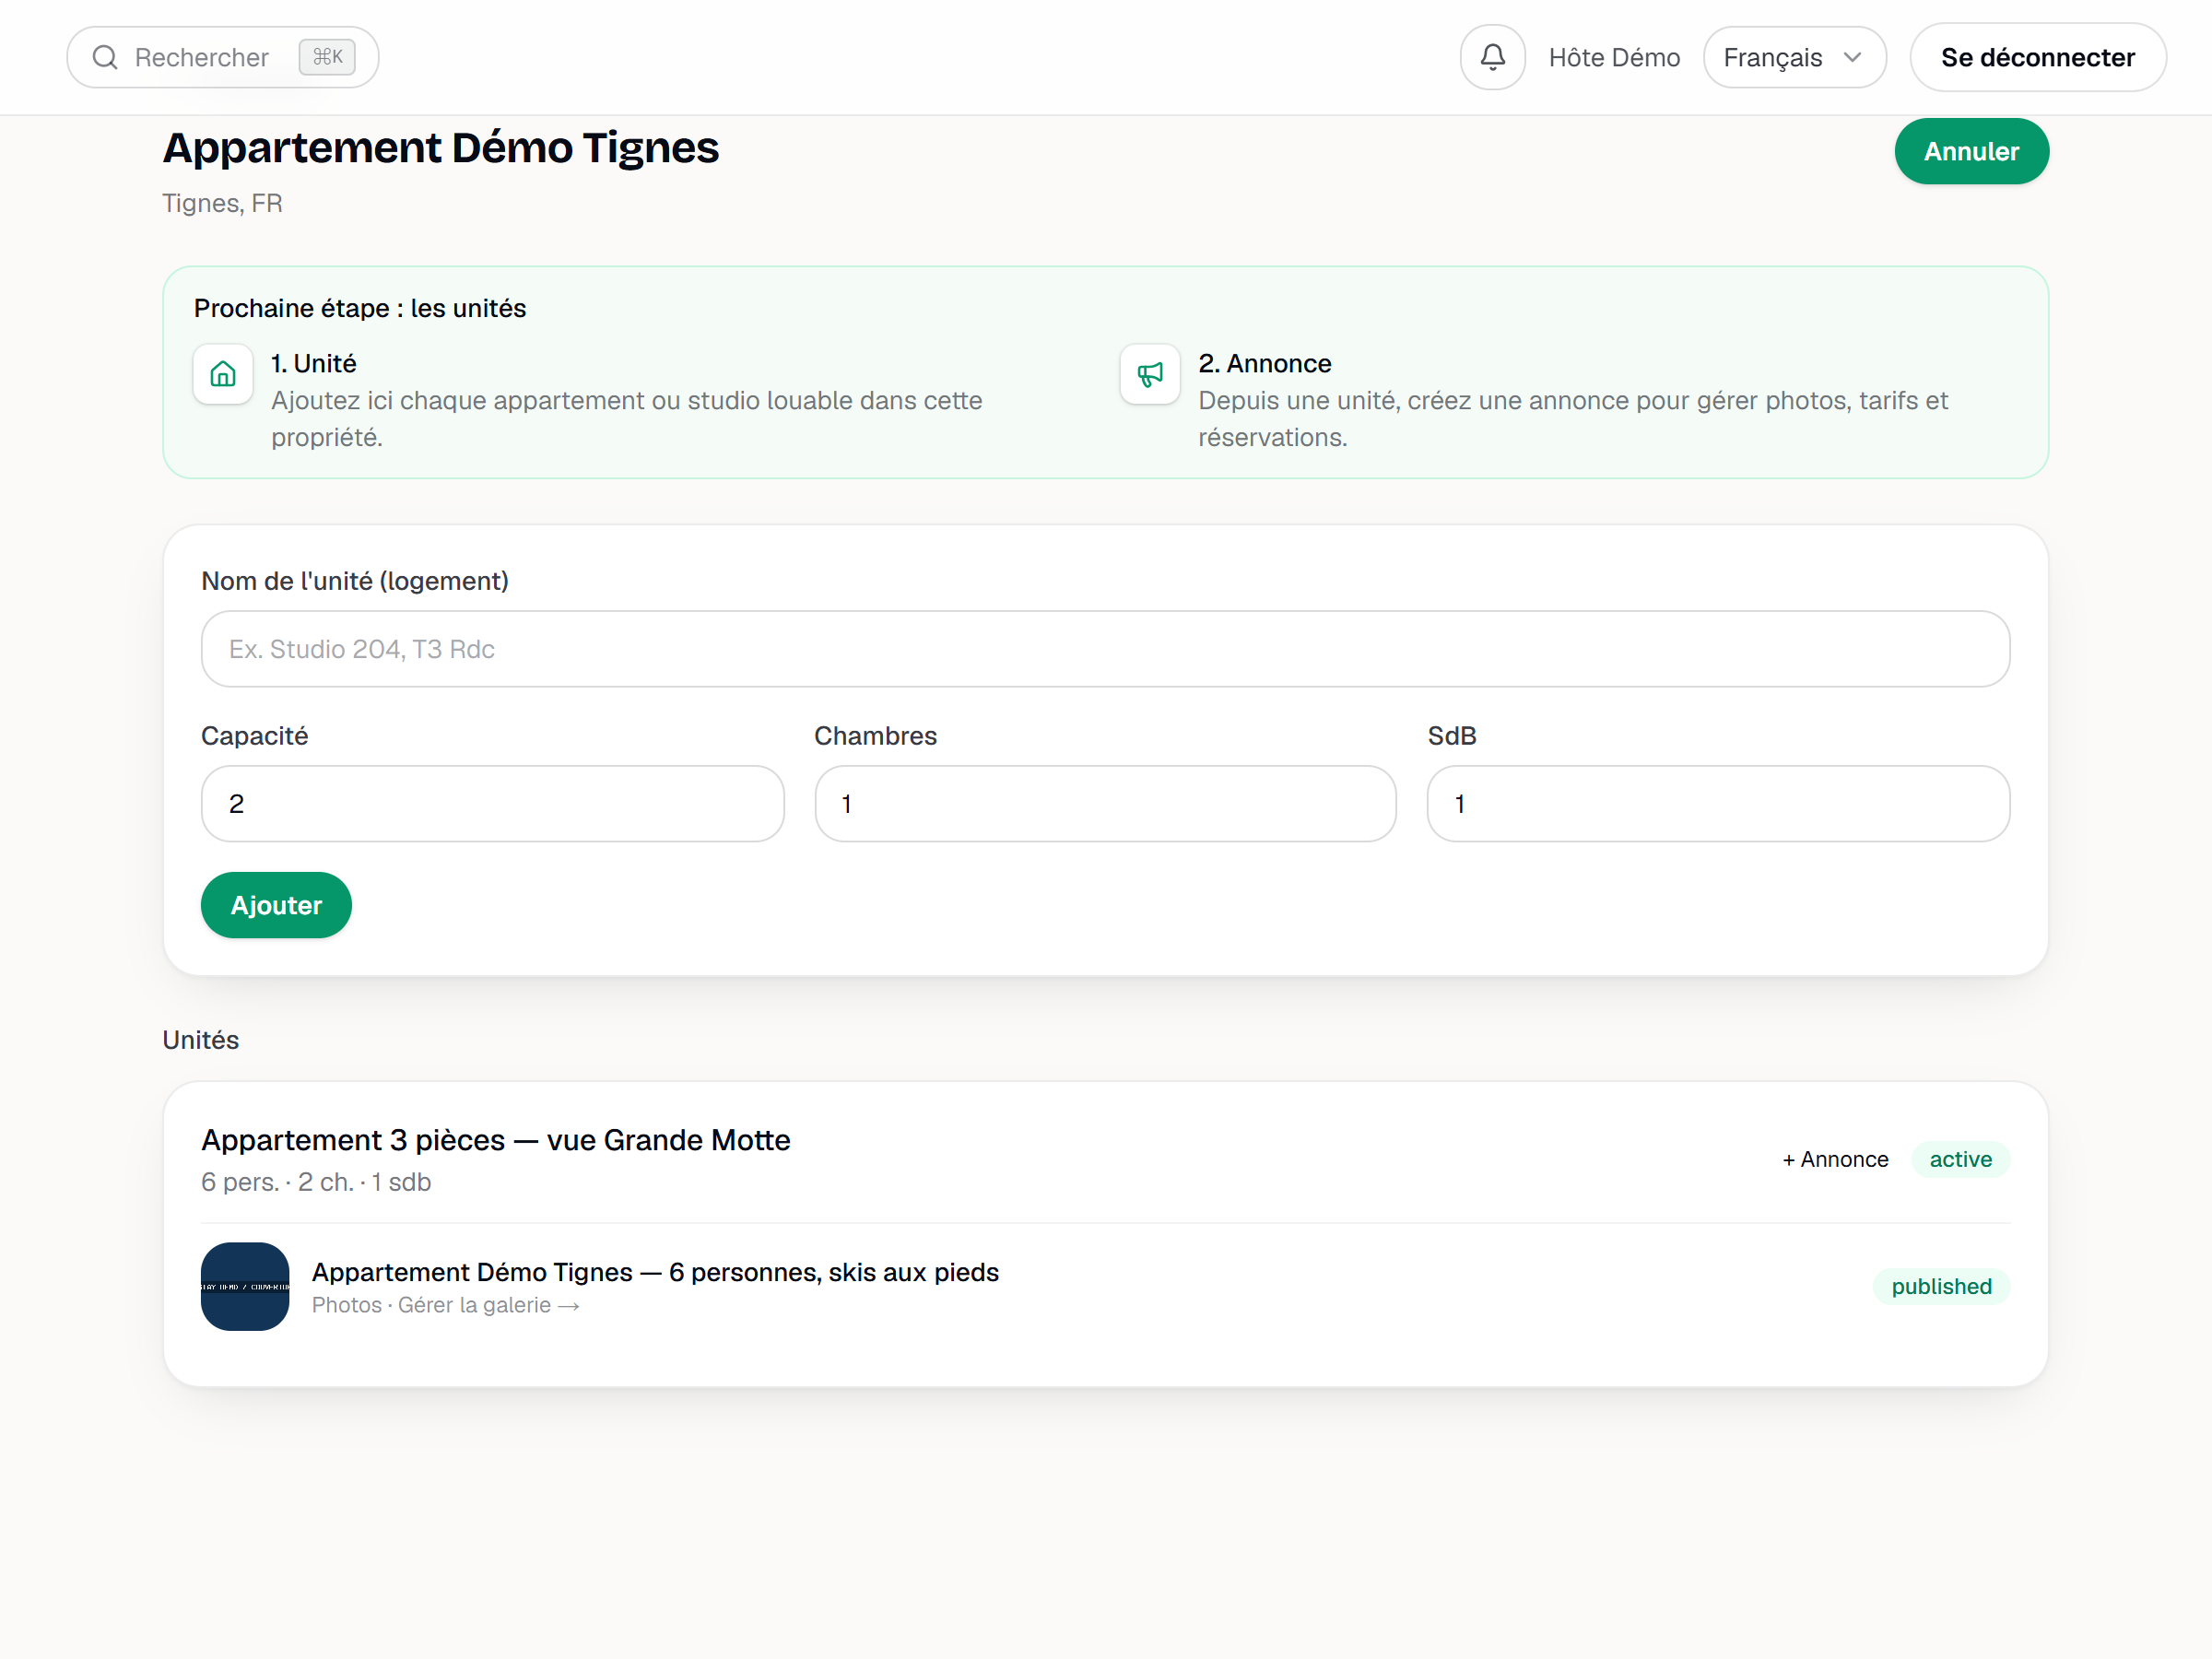
The property page with the “Add a unit” form expanded. Create the listing
Under the unit, the + Listing link creates the listing and shows a confirmation inviting you to open it and add photos. One unit can carry several listings; for a first run, one is plenty.
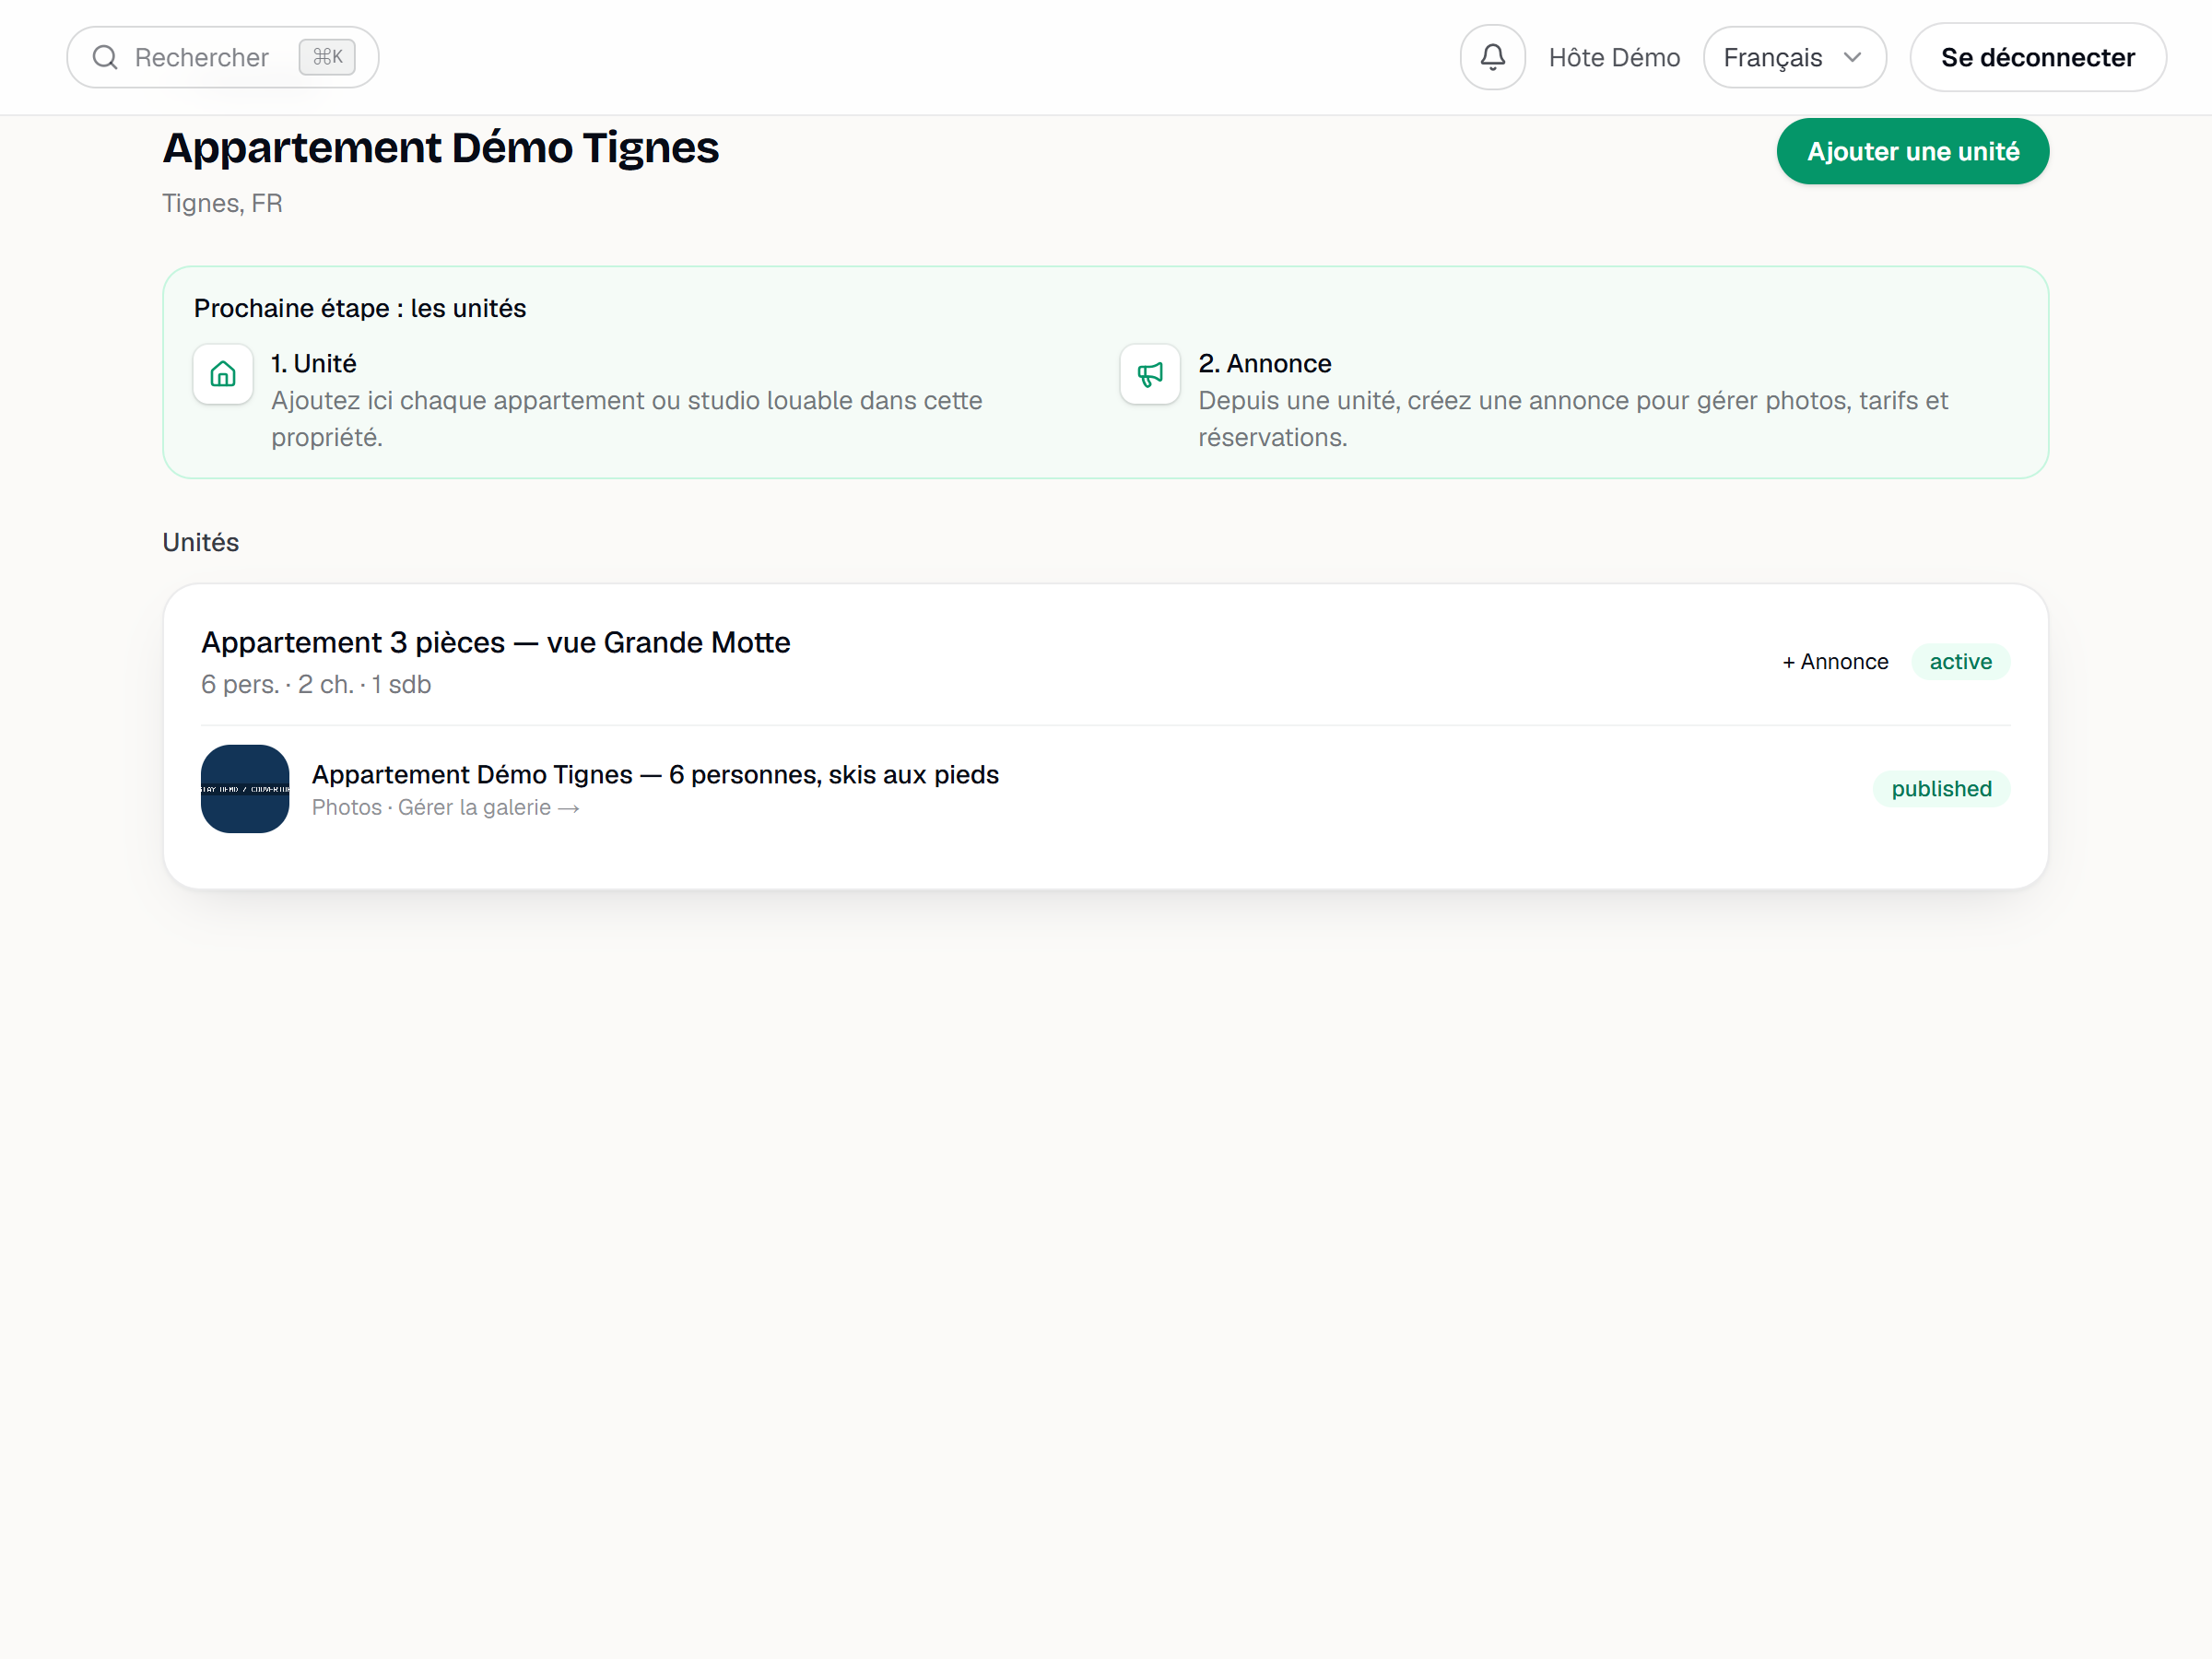
The list of units with the “+ Listing” link on one of them. Fill in the listing
The listing page gathers every completion card: photos, description, amenities, pricing, distribution, connected lock, and more. Start with photos and the rate — they are the only two things that govern publication.
The A cover photo requirement is met as soon as at least one photo is present in the gallery.
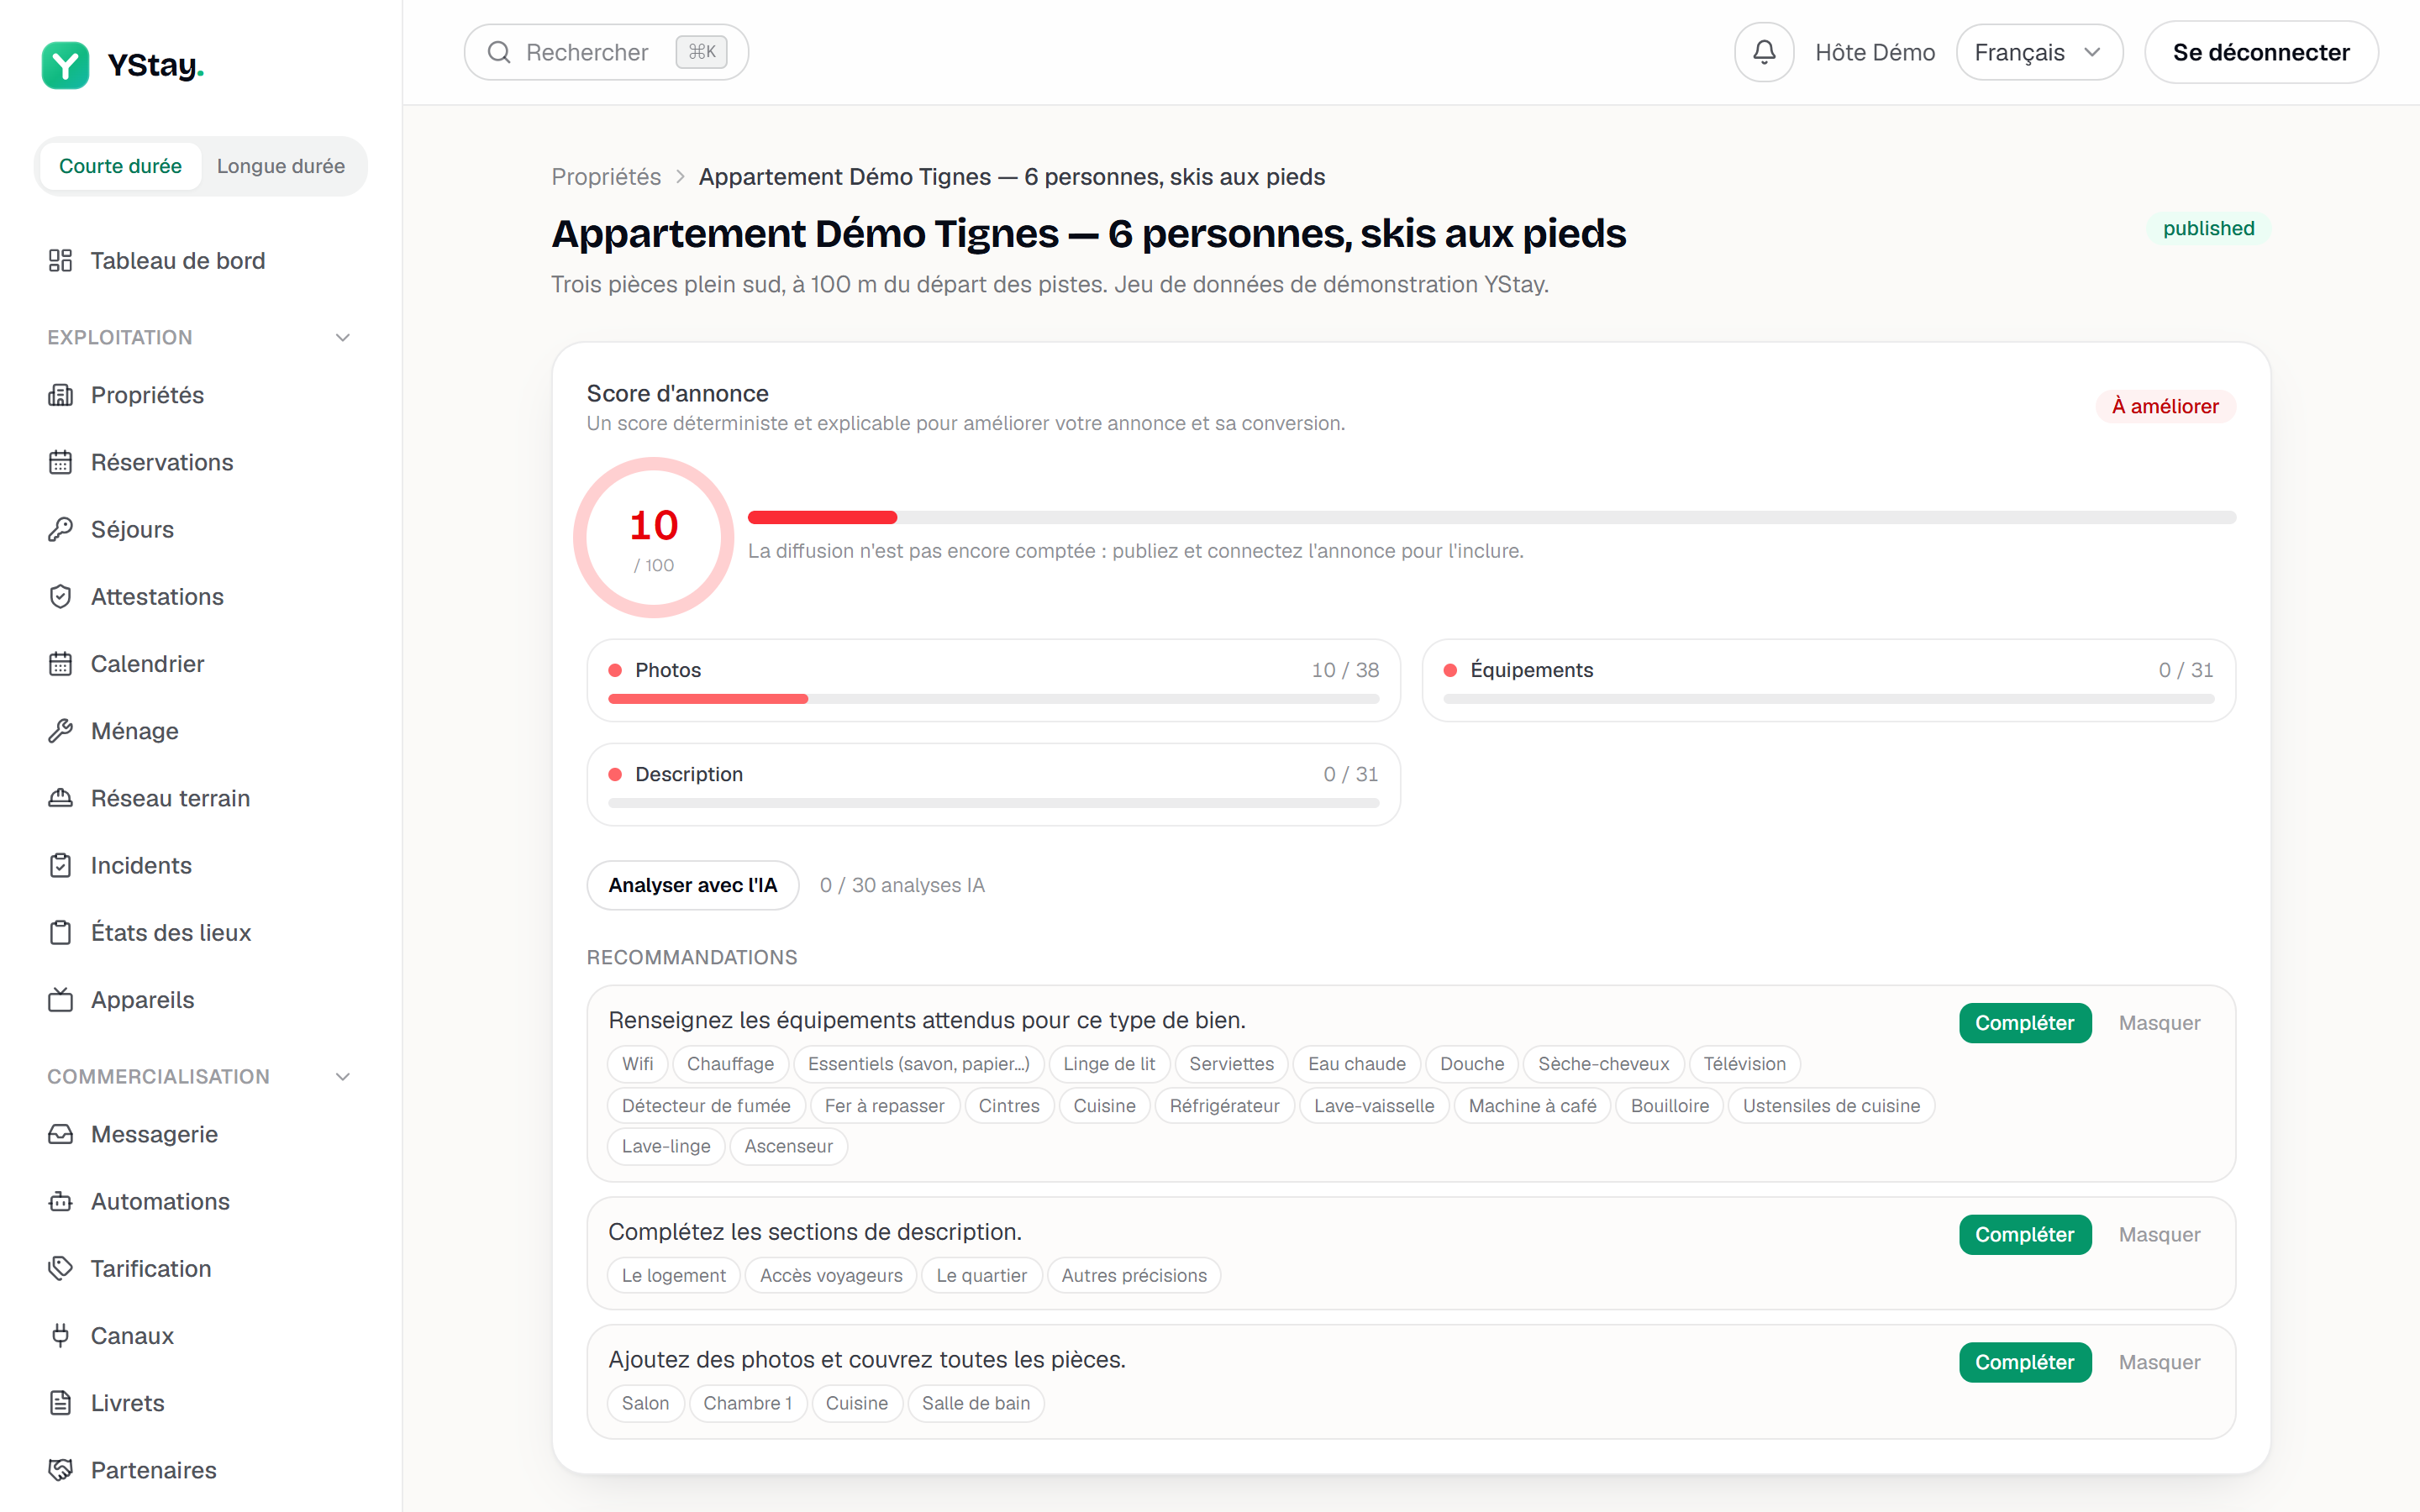
The listing page seen from the top, with its completion cards. Publish the listing
The Publishing card shows the checklist: A cover photo, A base rate configured, Payment terms (recommended). The first two lines govern the Publish the listing button; the third is advice, not a condition.
Once the listing is published, the card offers View booking page and Unpublish — publishing is never a one-way door.
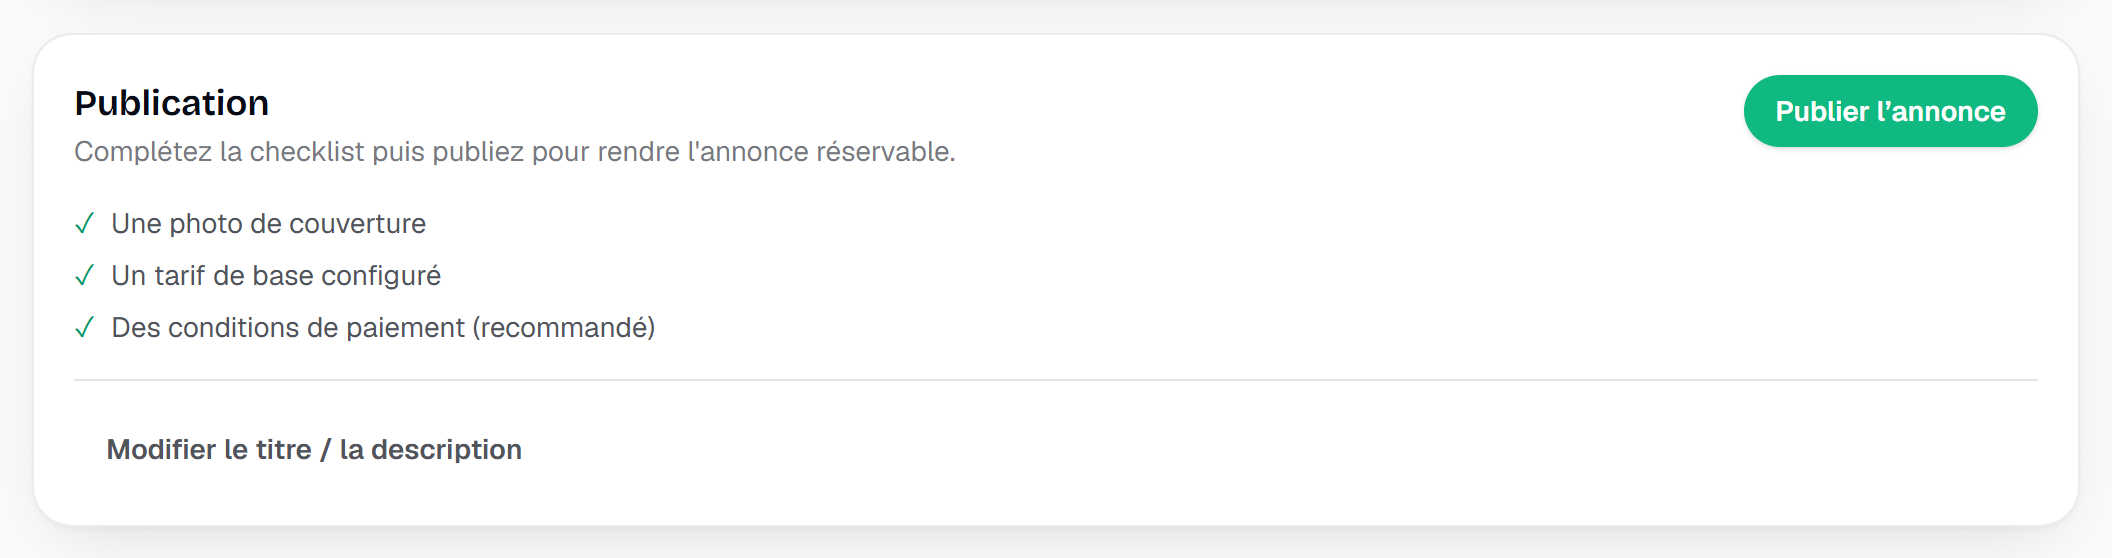
The Publishing card in draft state, checklist and Publish button visible.
If the Publish button stays disabled
Three possible causes, and only one shows on screen at a time.
- No photo. The A cover photo line offers no shortcut: go through the listing's photo card and upload at least one.
- No base rate. The A base rate configured line does offer a Complete link, which opens that listing's pricing directly — each listing has its own, even when several share the same unit.
- Trial period ended. The card then adds, below the checklist, the message “Trial ended — a ShortStay subscription is required to publish.” and a Subscribe link. A banner repeats it at the top of the dashboard.
While a photo or a rate is missing, the card also shows a quiet reminder: “Publishing requires at least one photo and a base rate.”
Next
- Enable payments (Stripe) — connect your payment account so traveller payments reach you.
- Listings — complete, translate and distribute a listing that is already live.
- Guidebooks — prepare the practical information handed to your travellers.
- Listing photos and zones — organise the gallery by zone and pick the cover photo that governs publishing.
- Description, amenities and listing score — write the four description sections, tick the amenities, and read the score they produce.
Updated on